Buttermilk Pecan Pralines – A Classic Southern Candy
Old-fashioned candy has a way of bringing people together, and few treats capture that timeless charm quite like
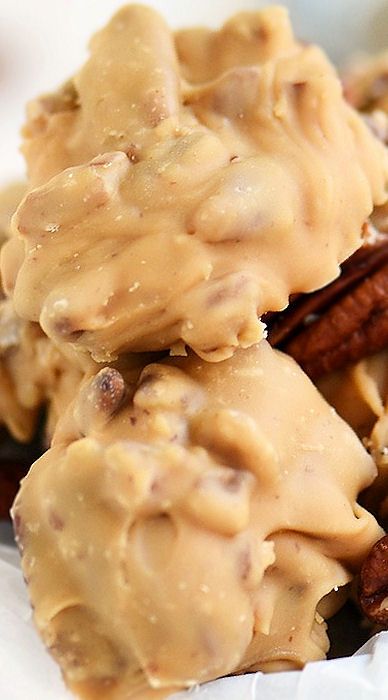
Buttermilk Pecan Pralines. These creamy, nut-studded confections are a Southern classic, loved for their
ultra-smooth texture, rich sweetness, and irresistible pecan flavor. Whether you’re making them for the holidays,
gifting friends and family, or simply indulging your sweet tooth, this recipe delivers nostalgic comfort in every bite.
What makes buttermilk pecan pralines so special is their unique balance of flavors. The slight tang from the buttermilk
cuts through the sweetness of sugar and corn syrup, while toasted pecans add crunch and warmth. The result is a candy
that’s decadent without being overwhelming—soft, creamy, and melt-in-your-mouth delicious.
Why This Old-Fashioned Candy Is Worth Making
Many people shy away from candy-making because it involves a candy thermometer, but this recipe proves that there’s
nothing to fear. With a reliable thermometer and clear instructions, you’ll unlock a whole world of homemade candy
possibilities. Once you master pralines, you’ll feel confident making fudge, caramels, and other classic sweets
year-round.
This recipe is especially beginner-friendly because it uses simple pantry ingredients and straightforward techniques.
The most demanding part is the stirring—and even that becomes part of the fun. Many seasoned candy makers enjoy
sharing the task with a friend, turning the process into a cozy kitchen memory.
Ingredients Overview
Before you begin, it’s important to gather and measure all your ingredients. Candy-making moves quickly once the sugar
mixture reaches temperature, so having everything ready ensures smooth success.
- 1 cup buttermilk – Adds richness and a subtle tang that balances the sweetness
- 3 cups granulated sugar – The foundation of the praline’s creamy texture
- 3/4 cup light corn syrup – Prevents crystallization and keeps the candy smooth
- 1 teaspoon baking soda – Creates a lighter, creamier consistency
- 1/4 teaspoon salt – Enhances flavor and balances sweetness
- 2 cups pecan halves – The star ingredient, providing crunch and nutty depth
- 2 teaspoons vanilla extract – Adds warmth and classic candy flavor
- 1 tablespoon butter – Finishes the pralines with richness and shine
Preparation Tips Before You Start
Before turning on the stove, read through the entire recipe at least once or twice. Candy-making requires attention,
timing, and confidence. Prepare a baking sheet lined with parchment paper or a silicone mat, and have a sturdy spoon
ready for mixing. A heavy-bottomed saucepan is essential to prevent scorching.
With your ingredients measured and tools prepared, you’re ready to move on to the cooking process—where sugar,
buttermilk, and patience transform into a truly unforgettable Southern candy.
Cooking the Praline Mixture – Where the Magic Begins
Once all your ingredients are measured and your tools are ready, it’s time to begin the true heart of this recipe:
cooking the praline base. This stage is where simple pantry staples transform into a smooth, creamy candy mixture.
Paying close attention during this step ensures your Buttermilk Pecan Pralines turn out perfectly
textured rather than grainy or overly firm.
Start by placing a heavy-bottomed saucepan over medium heat. Add the buttermilk,
granulated sugar, light corn syrup, salt, and
baking soda. Stir gently as the mixture begins to warm. At this stage, the goal is to dissolve the
sugar completely before the mixture reaches a boil.
Why a Candy Thermometer Matters
A candy thermometer is essential for achieving the correct consistency. Unlike baking, candy-making depends on
precise temperatures. As the mixture heats, sugars undergo physical changes that determine whether your pralines
will be soft and creamy or hard and brittle.
Clip your thermometer securely to the side of the saucepan, ensuring it doesn’t touch the bottom. This allows for
an accurate reading of the liquid temperature. Continue stirring occasionally until the mixture comes to a steady
boil.
Reaching the Soft-Ball Stage
Allow the mixture to boil without stirring until it reaches approximately 236–240°F (soft-ball stage).
This temperature range is crucial—it’s what gives pralines their signature creamy bite. Boiling too briefly may
result in runny candy, while overheating can cause the mixture to become grainy or overly stiff.
As the mixture cooks, you’ll notice it thickening slightly and developing a rich, golden color. The aroma will shift
from sharp sugar notes to a deeper, caramel-like scent. This is a sign you’re on the right track.
Adding Butter and Vanilla
Once the correct temperature is reached, remove the saucepan from heat immediately. Add the
butter and vanilla extract right away. These ingredients should be stirred in gently
until fully melted and incorporated. The butter adds a luxurious finish, while vanilla enhances the overall flavor
profile.
Avoid overmixing at this stage. The mixture should remain glossy and smooth. Stirring too aggressively can introduce
air bubbles or trigger premature crystallization, which may affect the final texture.
Incorporating the Pecans
Fold in the pecan halves, making sure they’re evenly coated with the praline mixture. Pecans should
be added while the candy base is still hot so they bind properly as the pralines set. Each spoonful should contain a
generous amount of nuts, ensuring every bite delivers that signature crunch.
At this point, the mixture will begin to thicken slightly as it cools. This is completely normal and signals that
you’re approaching the final and most satisfying step: shaping the pralines.
Beating the Candy – Creating That Signature Creamy Texture
This stage is what truly separates outstanding Buttermilk Pecan Pralines from average ones.
Once the pecans are fully incorporated and the mixture has slightly cooled, it’s time to beat the candy.
Beating encourages controlled crystallization, which is what gives pralines their iconic creamy, melt-in-your-mouth
consistency instead of a glassy or brittle finish.
Using a sturdy wooden spoon or heat-resistant silicone spatula, begin stirring the mixture steadily. At first, it
will be loose and glossy, flowing easily around the saucepan. As you continue stirring, you’ll feel the resistance
increase. The mixture will lose some of its shine and become thicker, almost fudge-like in texture.
This process can take anywhere from 5 to 10 minutes depending on temperature, humidity, and how
vigorously you stir. Don’t rush it. This step requires patience and a bit of arm strength, but the reward is well
worth the effort.
How to Know When It’s Ready
You’ll know the praline mixture is ready when it begins to hold its shape briefly after stirring. When lifted with
a spoon, it should fall back into the pan in thick ribbons rather than a smooth pour. The color will appear slightly
lighter and opaque, signaling that crystallization has begun.
If you stop beating too early, the pralines may spread too much and fail to set properly. If you beat too long, the
mixture can become overly stiff and difficult to spoon. Aim for a balance where the mixture is thick but still
workable.
Shaping the Pralines
Prepare a baking sheet lined with parchment paper or a silicone mat before you begin shaping. Working quickly, use
a spoon to drop portions of the praline mixture onto the prepared surface. Each spoonful should form a rustic mound
studded generously with pecans.
Traditional pralines are meant to look homemade and slightly imperfect, so don’t worry about achieving perfect
shapes. The charm of this candy lies in its old-fashioned appearance and rich, comforting flavor.
Setting and Cooling
Allow the pralines to cool at room temperature until fully set. This usually takes about
20 to 30 minutes. As they cool, the surface will firm up while the interior remains soft and creamy.
Avoid refrigerating the pralines, as rapid cooling can alter their texture and cause condensation. Letting them set
naturally ensures the best results.
Why This Step Matters
Proper beating and shaping are what give Buttermilk Pecan Pralines their legendary texture. This is
the step where your effort truly shines, transforming cooked sugar into a nostalgic Southern candy that tastes like
it came straight from a family recipe passed down through generations.
Once set, your pralines are ready to enjoy—or to move on to the final stage: storage, gifting, and serving ideas
that make these treats even more special.
Storing Buttermilk Pecan Pralines for Maximum Freshness
Once your Buttermilk Pecan Pralines have fully set and cooled, proper storage is essential to
preserve their creamy texture and rich flavor. These old-fashioned candies are best stored in an
airtight container at room temperature. When kept correctly, they will maintain their smooth,
melt-in-your-mouth consistency for up to 7 days.
To prevent sticking, layer the pralines between sheets of parchment or wax paper. This not only protects their
delicate surface but also makes it easier to remove individual pieces without breaking them.
Avoid refrigeration whenever possible. Cold temperatures can introduce moisture, which may cause the pralines to
become sticky or grainy. If you live in a particularly warm or humid climate, store them in the coolest, driest
spot in your home rather than the fridge.
Freezing Instructions (Optional)
While pralines are best enjoyed fresh, they can be frozen if necessary. Place them in a freezer-safe container,
separating layers with parchment paper. Freeze for up to 2 months. To thaw, let them sit at room
temperature—still covered—to prevent condensation from forming on the surface.
Serving Suggestions – Elevate the Experience
These Southern Buttermilk Pecan Pralines shine beautifully on their own, but they also pair
wonderfully with other treats. Serve them alongside a cup of hot coffee, spiced tea, or creamy hot chocolate for a
comforting dessert moment.
For an elegant presentation, arrange pralines on a dessert platter with fresh fruit, shortbread cookies, or dark
chocolate squares. Their creamy sweetness provides a perfect contrast to slightly bitter or tart flavors.
You can even crumble pralines over vanilla ice cream or use them as a topping for cakes, cheesecakes, or brownies.
Their buttery pecan crunch adds both texture and indulgence to any dessert.
Gifting Ideas – A Homemade Treasure
One of the greatest joys of making Buttermilk Pecan Pralines is sharing them. These candies make
unforgettable homemade gifts, especially during holidays, birthdays, or special celebrations.
Package pralines in decorative tins, glass jars, or cellophane bags tied with ribbon. Add a handwritten label or
recipe card for a personal touch. Not only does this elevate the presentation, but it also turns your candy into a
heartfelt keepsake.
Pro Tips for Gifting Success
- Make them fresh: Prepare pralines no more than two days before gifting.
- Protect the shape: Use parchment layers to prevent shifting during transport.
- Include storage notes: Let recipients know how to keep them fresh.
Why This Recipe Is So Loved
These pralines are cherished because they combine simple ingredients with
traditional technique. The tang of buttermilk balances the sweetness, the pecans provide satisfying
crunch, and the creamy texture delivers pure nostalgia in every bite.
Whether you’re continuing a Southern tradition or discovering pralines for the first time, this recipe delivers
consistent, bakery-quality results that feel both comforting and indulgent.
Final Thoughts – A Candy Worth Every Stir
Making Buttermilk Pecan Pralines is more than preparing candy—it’s creating a timeless treat that
brings people together. With patience, attention to detail, and a little arm strength, you’ll be rewarded with a
candy that looks beautiful, tastes incredible, and leaves a lasting impression.
Simple, rich, and undeniably Southern, this recipe proves that the best desserts don’t need to be complicated—just
made with care.