White Chocolate Raspberry Cheesecake Balls – A Decadent No-Bake Dessert
If you’re looking for a dessert that combines elegance, richness, and ease, these
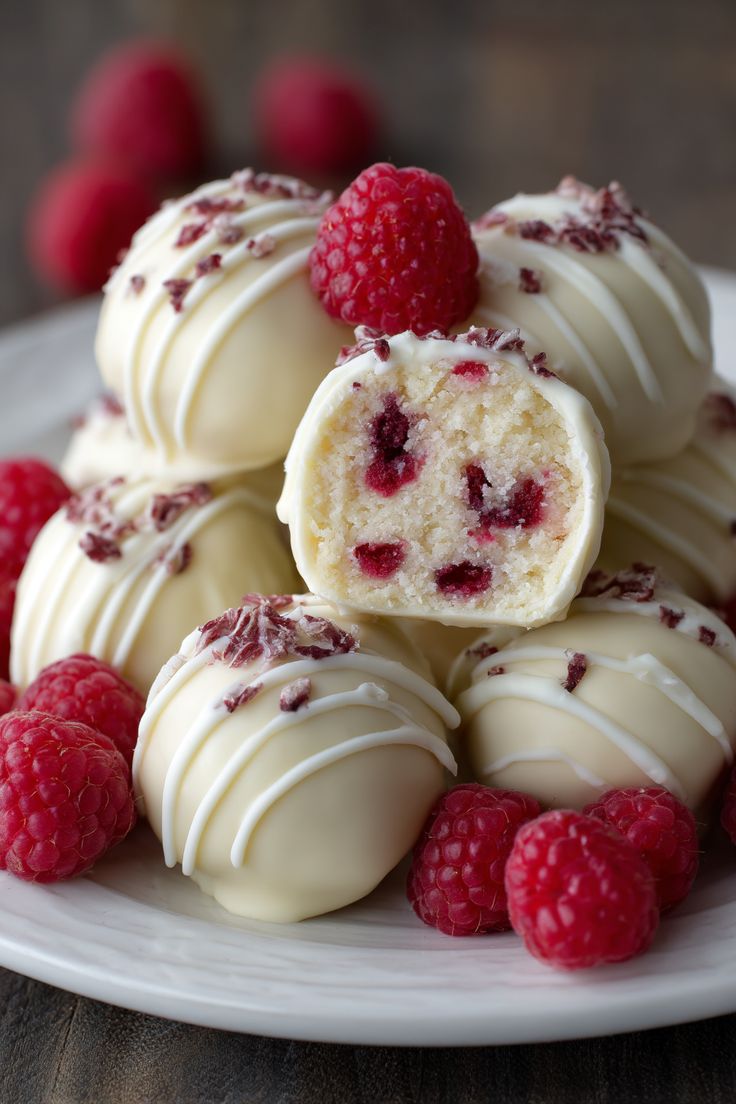
White Chocolate Raspberry Cheesecake Balls are an absolute showstopper.
Each bite delivers a creamy, tangy cheesecake center surrounded by sweet, smooth white chocolate, punctuated by bursts of tart raspberries. Perfect for parties, holidays, or simply treating yourself, these no-bake delights are simple to make yet feel luxurious.
Ingredients & Why They Matter
White Chocolate (8 oz, high-quality)
The coating that makes these cheesecake balls irresistibly smooth and glossy. High-quality white chocolate ensures a silky finish, deep flavor, and prevents graininess. It also provides the perfect sweet counterbalance to the tangy raspberry-cheesecake filling.
Cream Cheese (8 oz, softened)
The heart of the cheesecake filling. Softened cream cheese provides a creamy, rich, and slightly tangy base that melds perfectly with sugar and raspberries. Properly softened cream cheese ensures a smooth, lump-free mixture.
Graham Cracker Crust (½ cup, crushed)
Adds texture and a subtle crunch to each cheesecake ball. The lightly sweet, buttery flavor of graham crackers complements the tang of the cream cheese and the sweetness of white chocolate. You can substitute other cookies if desired, but graham crackers are classic.
Raspberries (¼ cup, fresh or thawed frozen)
Raspberries provide a tart contrast to the sweet, creamy filling. Fresh berries add juiciness and natural flavor, while frozen berries (thawed and drained) can be used year-round. Make sure to remove seeds if you want a smoother texture in your cheesecake balls.
Powdered Sugar (¼ cup)
Sweetens the cheesecake mixture without creating graininess. Powdered sugar dissolves easily, maintaining the creamy consistency and enhancing the white chocolate coating’s harmony with the filling.
Vanilla Extract (1 teaspoon)
Vanilla adds warmth and depth, complementing both the white chocolate and cream cheese. It enhances all other flavors subtly but effectively.
Optional Decorations
- Extra white chocolate drizzles
- Freeze-dried raspberry powder for color and tartness
- Edible glitter or sprinkles for a festive touch
Step 1: Prepare the Cheesecake Filling
Start by placing your softened cream cheese in a large mixing bowl. Use a hand mixer or stand mixer to beat the cream cheese on medium speed until it becomes smooth, creamy, and free of lumps. This step is critical; a smooth base ensures that the raspberry flavor integrates evenly and that your cheesecake balls are perfectly silky.
Next, gradually add the powdered sugar. Beat on low speed at first to prevent a sugar cloud from forming, then increase to medium speed until fully incorporated. The sugar sweetens the filling while keeping the texture delicate and creamy. Avoid overbeating once sugar is added, as it can introduce too much air and make the filling less stable.
Step 2: Add the Graham Cracker Crust
Gently fold in the crushed graham crackers using a spatula. This will add a slight crunch and body to your filling. Be careful not to overmix; you want the crackers distributed evenly without breaking down the creamy texture of the cream cheese. This small crunch is what gives each bite that perfect balance between smooth and textured.
Step 3: Incorporate the Raspberries
Fold in the raspberries very gently. If using frozen berries, make sure they are thawed and drained to avoid excess moisture, which could make the balls too soft. You can lightly mash some berries for a marbled effect while leaving others whole for pops of tartness. This step adds bursts of color and flavor that create a beautiful visual and taste contrast against the white chocolate.
Step 4: Add Vanilla Extract
Mix in the vanilla extract to round out the flavor. Vanilla enhances both the cream cheese and the white chocolate flavors, tying all elements together into a harmonious dessert filling.
Step 5: Chill the Filling
Cover the mixing bowl with plastic wrap and refrigerate for at least 30 minutes. Chilling firms up the filling slightly, making it much easier to shape into balls. A cold, dense filling also ensures that the balls hold their shape when dipped in white chocolate later.
Step 6: Shape the Cheesecake Balls
Once the filling is chilled, scoop out portions using a small cookie scoop or spoon—about 1 tablespoon per ball works well. Roll each portion gently between your palms to form smooth, round balls. The key is to handle the mixture lightly to preserve the creamy texture inside while achieving a uniform shape for dipping.
Place the shaped balls on a parchment-lined baking sheet. Make sure to leave some space between each ball to prevent them from sticking together. Once all balls are formed, refrigerate again for another 30 minutes to an hour. This step is essential as it firms the balls, ensuring that the coating will adhere evenly without cracking.
Step 7: Prepare the White Chocolate Coating
Choose high-quality white chocolate chips or melting wafers for the coating. The quality of the chocolate directly affects both flavor and texture. Chop the chocolate into uniform pieces to ensure even melting. Using a heat-safe bowl, melt the chocolate either in a double boiler over simmering water or in the microwave in short bursts of 20–30 seconds, stirring between each interval. This prevents scorching and helps achieve a smooth, glossy coating.
For extra shine and a smoother dip, add 1–2 teaspoons of vegetable oil or light corn syrup to the melted chocolate. Stir well to combine. This small addition thins the chocolate slightly, making it easier to coat the cheesecake balls evenly without cracking.
Step 8: Dip the Cheesecake Balls
Remove the chilled cheesecake balls from the refrigerator. Using a fork, toothpick, or dipping tool, carefully submerge one ball at a time into the melted white chocolate. Ensure it is fully coated by gently rotating it within the chocolate. Lift the ball and allow excess chocolate to drip back into the bowl to prevent a thick, uneven coating.
Place the coated ball back on the parchment-lined baking sheet. Repeat this process for all balls, making sure to work quickly but carefully so that the chocolate remains fluid and smooth. The goal is a thin, even layer of chocolate that hardens with a glossy finish.
Step 9: Add Decorative Touches
While the chocolate is still wet, sprinkle toppings over each cheesecake ball. Options include:
- Freeze-dried raspberry pieces for color and intensified berry flavor.
- Colored sugar or sprinkles for a festive or elegant look.
- White chocolate drizzle in contrasting patterns using a fork or piping bag.
This step allows for creative customization and ensures that each truffle looks like a professional, bakery-style dessert.
Step 10: Set the Chocolate
Once decorated, refrigerate the cheesecake balls for at least 1 hour, or until the chocolate coating is completely firm. Chilling ensures that the truffles hold their shape and that each bite maintains a balance between creamy filling and crisp coating. Avoid storing at room temperature for long periods, as white chocolate can soften in warmer conditions.
Step 11: Serving Suggestions
Arrange your White Chocolate Raspberry Cheesecake Balls on a decorative platter or in cupcake liners for individual servings. These truffles pair beautifully with:
- Fresh berries for added color and tang.
- Light whipped cream to enhance creaminess.
- Hot coffee or tea for a sophisticated dessert experience.
They also make excellent gifts when wrapped in cellophane with a ribbon, perfect for holidays or special occasions.
Step 12: Storage Tips
Store the truffles in an airtight container in the refrigerator for up to 7 days. For longer storage, they can be frozen for up to 1 month. When freezing, place them on a tray to set initially, then transfer to a container, ensuring they don’t stick together. Thaw in the refrigerator before serving and consider reapplying a light dusting of powdered sugar or drizzle for a fresh presentation.
Step 13: Perfecting the Finish
Once the chocolate coating has set, inspect each cheesecake ball carefully. Look for any uneven spots, cracks, or excess chocolate drips. Use a small offset spatula or the back of a spoon to gently smooth imperfections. Attention to these details ensures that every truffle looks like a professionally crafted dessert, appealing both visually and texturally.
Step 14: Creative Garnishes
For a stunning presentation, consider adding additional garnishes that complement both flavor and aesthetics:
- White chocolate drizzle: Melt a small portion of white chocolate and use a piping bag or fork to create delicate zig-zag patterns over the truffles.
- Freeze-dried raspberry dust: Crush freeze-dried raspberries into a fine powder and lightly dust over the truffles for a vibrant pop of color.
- Edible glitter or shimmer dust: Adds a festive sparkle, perfect for holiday parties or gift boxes.
- Chopped nuts: Finely chop pecans or almonds and sprinkle on top before the coating fully sets for added crunch and sophistication.
These finishing touches elevate simple truffles into luxurious, eye-catching treats that feel special with every bite.
Step 15: Packaging & Gifting Ideas
These cheesecake balls are ideal for gifting. Here are some tips for making them look as amazing as they taste:
- Place each truffle in a mini cupcake liner to prevent sticking and create a polished appearance.
- Use a decorative box or tin with parchment paper to package multiple truffles for holidays or celebrations.
- Wrap individual truffles in cellophane tied with colorful ribbons for party favors or neighbor gifts.
- Include a small label or tag with the flavor and a personal message—this adds a personal, professional touch.
Proper packaging not only preserves freshness but also transforms your homemade treats into impressive gifts.
Step 16: Tips for Serving Like a Pro
When serving your White Chocolate Raspberry Cheesecake Balls at a gathering or party, presentation matters. Arrange them neatly on a decorative platter, alternating colors or patterns to create visual appeal. Add fresh raspberries, mint leaves, or edible flowers around the platter to complement the flavor profile and create an Instagram-worthy display.
For events with multiple desserts, consider placing them next to complementary flavors like dark chocolate truffles, lemon bars, or mini tartlets. This not only enhances the visual impact but also gives guests options, making your dessert table feel curated and intentional.
Step 17: Storage and Shelf Life
Store the cheesecake balls in an airtight container in the refrigerator for up to 7 days. To maintain the perfect texture of both the creamy center and crisp chocolate shell, avoid storing in warm areas. For longer-term storage, these truffles can be frozen for up to 1 month. When freezing:
- Place them in a single layer on a parchment-lined tray to prevent sticking.
- Once frozen, transfer them to a freezer-safe container with parchment layers in between.
- Thaw in the refrigerator before serving, and lightly dust with powdered sugar or add a drizzle of white chocolate to refresh the appearance.
Following these storage tips ensures that your cheesecake balls taste as fresh and indulgent as the day they were made.
Step 18: Frequently Asked Questions
Q: Can I use flavored white chocolate instead of plain?
A: Yes! Vanilla, orange, or raspberry-infused white chocolate can enhance the flavor, but always choose high-quality chips or couverture for best results.
Q: Can I substitute cream cheese with mascarpone?
A: Mascarpone works beautifully for a slightly richer, less tangy filling. Reduce additional sugar slightly to balance sweetness.
Q: Can these be made ahead of time?
A: Absolutely. Prepare the truffles up to a week in advance and store in the refrigerator. The flavors often meld beautifully, making them even tastier.
Step 19: Advanced Flavor Enhancements
To take your White Chocolate Raspberry Cheesecake Balls to the next level, consider subtle flavor enhancements that elevate both aroma and taste. Here are some advanced techniques:
- Alcohol-Infused Varieties: Add a teaspoon of raspberry liqueur, Grand Marnier, or Chambord to the cheesecake mixture. This creates a sophisticated dessert with depth and a hint of adult indulgence.
- Layered Chocolate Coatings: Use dark chocolate on the bottom half of the truffle and white chocolate on top for a visually striking contrast and complex flavor profile.
- Textured Crunch: Incorporate finely crushed freeze-dried raspberries, pistachios, or toasted coconut flakes into the outer chocolate coating for added crunch and dimension.
- Citrus Notes: Add a small amount of lemon or orange zest to the cheesecake mixture. The subtle citrus aroma complements the sweetness of white chocolate and the tartness of raspberries.
Step 20: Layered Visual Presentation
Professional presentation matters, especially if serving at parties or gifting. Here are some tips:
- Use a tiered dessert stand to create height and visual interest. Place each cheesecake ball in a mini cupcake liner to keep them neat.
- Alternate colors if using colored chocolate coatings or freeze-dried raspberry dusting. A gradient effect on the platter enhances the aesthetic appeal.
- Drizzle contrasting chocolate in zigzags or create decorative swirls with a toothpick for a polished, bakery-style finish.
- Add fresh raspberries, mint leaves, or edible flowers around the platter for a sophisticated touch that elevates the dessert table.
Step 21: Flavor Pairing Suggestions
Pair your cheesecake balls with other desserts or beverages to create a memorable tasting experience:
- Wine Pairing: Sweet or semi-sweet wines such as Moscato, Riesling, or a sparkling rosé complement the creamy, tart flavors.
- Chocolate Pairing: Serve alongside dark chocolate truffles, milk chocolate bark, or chocolate-dipped fruit for a chocolate-lover’s dream plate.
- Tea & Coffee Pairing: Raspberry cheesecake balls pair beautifully with Earl Grey, chamomile, or a bold espresso, balancing sweetness with warmth and aromatics.
- Seasonal Pairing: Include them in holiday dessert trays with peppermint bark, gingerbread cookies, or white chocolate peppermint truffles for festive appeal.
Step 22: Troubleshooting Common Issues
Even seasoned bakers can encounter challenges. Here’s how to handle them:
- Truffles too soft: Chill the mixture longer before rolling or add a small amount of powdered sugar to stabilize.
- Chocolate coating cracking: Ensure the truffles are cold, not frozen, before dipping. Temper your chocolate for flexibility and smooth coating.
- Cheesecake mixture too sweet: Reduce powdered sugar slightly or incorporate a teaspoon of lemon juice to balance sweetness.
- Uneven coating: Use a fork or dipping tool to allow excess chocolate to drip off before setting on parchment paper.
Step 23: Holiday & Gift-Ready Ideas
These truffles are perfect for holidays, birthdays, or corporate gifting. Consider these enhancements:
- Place a single truffle in a clear cellophane bag, tied with festive ribbon.
- Layer different flavored truffles in a decorative tin with parchment dividers for variety and elegance.
- Attach a small, personalized label indicating flavor, date made, and “handcrafted with love” for a professional touch.
- Include a few freeze-dried raspberries or chocolate drizzle inside the packaging for extra flair.
Step 24: Serving Tips and Timing
For optimal enjoyment, serve White Chocolate Raspberry Cheesecake Balls slightly chilled, but not ice cold. This allows the creamy center to be smooth and luscious, while the outer coating remains firm and crisp. Place them on a decorative platter or individual dessert plates. If serving at a buffet or event:
- Space the truffles to allow easy picking without touching others.
- Use mini tongs or decorative toothpicks for hygienic serving.
- Group by coating color or flavor to create visual order and aesthetic appeal.
Step 25: Final Thoughts
The beauty of these White Chocolate Raspberry Cheesecake Balls lies in their balance of flavors and textures—creamy, tangy centers; crisp, sweet coatings; and bursts of fruity tartness. With attention to detail in coating, garnishing, and presentation, these truffles are not only a treat for the taste buds but also a feast for the eyes.