Old Fashioned Chocolate Fudge – A Timeless Classic That Never Fails
Few desserts can rival the pure comfort and nostalgic charm of old fashioned chocolate fudge.
This beloved classic has been passed down through generations, cherished for its deep chocolate flavor,
melt-in-your-mouth texture, and unbelievably simple ingredient list. Long before fancy mixers and gourmet
chocolates became common, home cooks relied on this exact method to create rich, indulgent fudge in under
twenty minutes—and it still works flawlessly today.
What makes this recipe so special is its honesty. There are no shortcuts disguised as upgrades, no unnecessary
ingredients, and no complicated techniques. Just sugar, cocoa, butter, evaporated milk, and vanilla
coming together through careful stirring and perfect timing. The result is a smooth, velvety fudge that slices
cleanly, sets beautifully, and tastes exactly the way chocolate fudge is meant to taste.
This classic homemade fudge is perfect for holidays, bake sales, gifting, or simply satisfying
a deep chocolate craving on a quiet evening. It’s the kind of recipe that becomes a family tradition—the one
written on an index card, splattered with cocoa, and guarded like a secret treasure. Once you master it, you’ll
never need another fudge recipe again.
Unlike modern versions that rely on marshmallow fluff or condensed shortcuts, this old fashioned method develops
its signature texture through controlled boiling and continuous stirring. That process allows the sugar crystals
to dissolve properly, creating a creamy, non-grainy fudge that feels luxurious on the tongue.
It’s proof that simplicity, when done right, always wins.
Whether you’re making this fudge for Christmas trays, potlucks, or a last-minute dessert that still feels special,
this recipe delivers consistent, foolproof results. And best of all, it comes together in less than twenty
minutes from start to finish—no thermometer required.
Ingredients for Old Fashioned Chocolate Fudge and Why Each One Matters
One of the greatest strengths of old fashioned chocolate fudge is its short, purposeful
ingredient list. Every component in this recipe serves a specific function, and when combined correctly,
they create a perfectly smooth, rich, and sliceable fudge with no shortcuts required.
Understanding the role of each ingredient is the key to achieving consistent, professional-quality results.
- Granulated Sugar (2 cups) – Sugar is the structural backbone of this fudge.
When heated and dissolved properly, it forms the smooth matrix that allows the fudge to set firm
while remaining creamy. Stirring continuously during boiling prevents crystallization,
which is essential for avoiding grainy texture. - Unsweetened Cocoa Powder (4 tablespoons) – Cocoa powder delivers intense,
deep chocolate flavor without added fats. Using a high-quality cocoa ensures a bold,
nostalgic chocolate taste that defines traditional fudge. Sifting the cocoa before mixing
helps it incorporate evenly into the sugar, preventing lumps. - Salted Butter (1 stick) – Butter adds richness, silkiness, and flavor depth.
The salt in salted butter subtly balances the sweetness and enhances the chocolate.
As the butter melts, it coats sugar particles, helping create a smoother final texture. - Evaporated Milk (5 oz can) – Evaporated milk provides creaminess and moisture
without excess water. Because it is concentrated, it allows the fudge to cook evenly and
set properly. This ingredient is crucial for achieving the classic soft-but-firm consistency
that old fashioned fudge is known for. - Pure Vanilla Extract (1 teaspoon) – Vanilla rounds out the chocolate flavor
and adds warmth. Added at the end of cooking, it preserves its aromatic qualities and
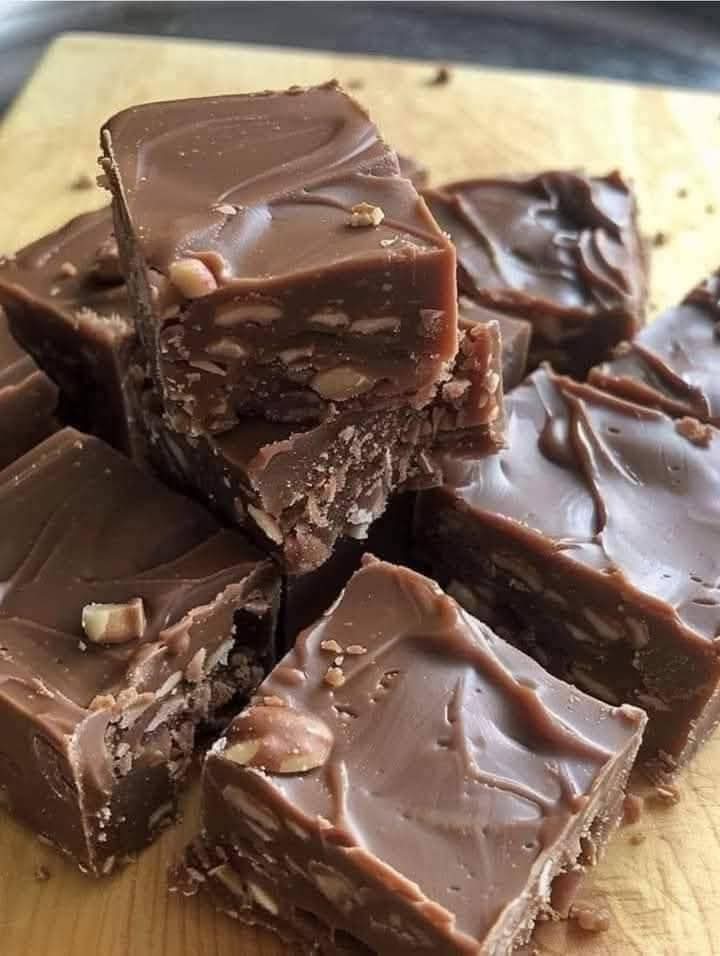
enhances the overall depth of flavor without overpowering the cocoa. - Optional Nuts (chopped walnuts or pecans) – Nuts are entirely optional but
traditional. They add texture, contrast, and a subtle nutty richness that complements
the chocolate beautifully. Toasting them beforehand intensifies their flavor and prevents
sogginess.
These ingredients may appear simple, but their interaction during cooking is what creates
the magic. Proper heat control, timing, and stirring allow the sugar and cocoa to dissolve
completely, while the butter and milk emulsify into a luxurious, glossy mixture.
Skipping or substituting ingredients can dramatically affect the outcome, which is why this
recipe works best when followed precisely. When treated with care, these pantry staples
transform into a decadent, old-school fudge that tastes like it came straight
from a vintage candy shop.
Step-by-Step Instructions for Perfect Old Fashioned Chocolate Fudge
Making classic old fashioned chocolate fudge is all about patience, attention,
and timing. While the ingredient list is simple, the cooking process requires care to ensure
the sugar dissolves properly and the fudge sets with a smooth, creamy texture instead of
becoming grainy or overly firm.
Step 1: Prepare the Pan
Begin by lining an 8×8-inch baking dish with parchment paper or lightly greasing
it with butter. This step ensures the fudge releases easily once set and allows for clean,
neat slices. Set the pan aside before you begin cooking so it’s ready when the fudge is finished.
Step 2: Combine the Dry Ingredients
In a heavy-bottomed saucepan, whisk together the granulated sugar and
unsweetened cocoa powder until fully blended. This dry mixing step is critical,
as it evenly distributes the cocoa throughout the sugar and prevents clumps from forming
once liquids are added.
Step 3: Add Butter and Evaporated Milk
Place the saucepan over medium heat and add the salted butter
and evaporated milk. Stir continuously as the butter melts and the mixture
begins to warm. Continuous stirring at this stage helps dissolve the sugar gradually and
prevents scorching on the bottom of the pan.
Step 4: Bring to a Controlled Boil
Once the mixture reaches a steady boil, reduce the heat slightly to maintain a controlled,
rolling boil. Continue stirring constantly for 7 full minutes. This timing
is essential, as it allows excess moisture to evaporate while ensuring the sugar reaches
the proper temperature for setting.
Stirring should be steady and thorough, scraping the bottom and sides of the pan to prevent
sticking or burning. Rushing this step or stopping the stirring can result in uneven texture
or crystallization.
Step 5: Remove from Heat and Add Vanilla
After exactly seven minutes of boiling, remove the saucepan from heat. Immediately add the
vanilla extract and stir vigorously for an additional 3 minutes.
This final stirring phase cools the mixture slightly while incorporating air, giving the fudge
its signature creamy consistency.
Step 6: Optional Nuts
If using nuts, fold them in during the final minute of stirring. This ensures even distribution
without breaking them down. Walnuts or pecans work especially well, adding texture and richness
without overpowering the chocolate.
Step 7: Pour and Set
Pour the fudge into the prepared pan immediately, smoothing the surface with a spatula if needed.
Allow the fudge to cool at room temperature until fully set. Avoid refrigeration at this stage,
as rapid cooling can affect texture.
Once firm, lift the fudge from the pan, slice into squares, and admire the smooth, glossy finish
that defines truly perfect old fashioned chocolate fudge.
Why This Old Fashioned Chocolate Fudge Recipe Is So Loved
There is something deeply comforting about old fashioned chocolate fudge.
This recipe has stood the test of time because it delivers exactly what people crave:
a rich chocolate flavor, a perfectly smooth texture, and the unmistakable taste of
homemade nostalgia. Unlike modern shortcuts or overly sweet variations, this classic
method focuses on balance, technique, and simplicity.
One of the biggest reasons this recipe is cherished is its authentic texture.
When made correctly, the fudge is firm yet soft, holding its shape without becoming crumbly
or overly dense. Each bite melts slowly on the tongue, releasing deep cocoa notes balanced
by creamy butter and subtle vanilla.
Another reason for its popularity is the short ingredient list. Many people
are drawn to recipes that rely on pantry staples rather than specialty items. Sugar, cocoa,
butter, evaporated milk, and vanilla come together to create something far greater than the
sum of their parts.
The Nostalgia Factor
This fudge recipe often carries emotional value. It reminds people of family gatherings,
handwritten recipe cards, and holiday kitchens filled with warmth. The act of stirring
continuously at the stove mirrors how generations before us cooked—slowly, carefully,
and with intention.
Because it comes together in under 20 minutes, it feels almost magical. Watching simple
ingredients transform into glossy, thick fudge creates a sense of accomplishment that
modern no-cook recipes rarely match.
Common Mistakes and How to Avoid Them
Even though this recipe is simple, there are a few common pitfalls that can affect the final
result. Understanding these ahead of time ensures your chocolate fudge
turns out flawless every time.
- Stopping the stirring: Constant stirring prevents burning and ensures
even sugar dissolution. Never walk away during the boiling stage. - Incorrect boil time: Boiling for less than seven minutes can result in
soft, unset fudge, while boiling too long may create a dry or crumbly texture. - Using high heat: Too much heat can scorch the cocoa and butter, leading
to bitterness. Medium heat is ideal. - Skipping the final stir: The final three minutes of stirring after removing
from heat are crucial for smoothness.
Expert Tips for Perfect Fudge Every Time
For the smoothest possible fudge, always use a heavy-bottomed saucepan.
Thin pans heat unevenly and increase the risk of burning. Measuring ingredients precisely
also makes a noticeable difference, especially with sugar and liquid ratios.
If your kitchen is humid, allow a little extra cooling time before slicing. Humidity can
affect how quickly the fudge sets, though it will not impact flavor.
Finally, trust the process. Old fashioned fudge rewards patience and attention, producing
a dessert that feels both luxurious and deeply familiar.
Serving Suggestions That Elevate This Classic Fudge
One of the greatest joys of old fashioned chocolate fudge is how versatile it is
when it comes to serving. While it is undeniably delicious on its own, a few thoughtful
presentation ideas can transform this simple treat into a show-stopping dessert suitable
for any occasion.
For a traditional approach, cut the fudge into neat squares and arrange them on a serving
platter lined with parchment paper. This highlights the smooth texture and rich color,
allowing the fudge to speak for itself. A light dusting of cocoa powder or powdered sugar
can add a subtle decorative touch without overpowering the flavor.
If you want to create a more indulgent dessert experience, serve small pieces of fudge
alongside vanilla ice cream. The contrast between the cold, creamy ice cream
and the dense, chocolatey fudge is irresistible and instantly elevates the dish.
This fudge also pairs beautifully with fresh fruit. Strawberries, raspberries, or sliced
bananas help balance the richness with natural acidity and freshness. For holiday platters,
combining fudge with cookies, truffles, and nuts creates a visually stunning dessert spread.
How to Store and Preserve Freshness
Proper storage ensures your homemade chocolate fudge remains just as delicious
days after it’s made. Once the fudge has fully set and been cut into pieces, store it in an
airtight container to protect it from drying out or absorbing other odors.
At room temperature, fudge stays fresh for up to one week, making it ideal for
gifting or preparing ahead of time. If you live in a warmer climate, storing it in the
refrigerator is recommended to maintain firmness.
When refrigerated, fudge can last up to two weeks. Allow it to come to room
temperature before serving to restore its creamy texture and full flavor.
This recipe also freezes exceptionally well. Wrap individual pieces in parchment paper,
then place them in a freezer-safe container. Frozen fudge keeps for up to
three months. Thaw slowly in the refrigerator or at room temperature for best results.
Why This Recipe Outshines Modern Versions
In a world filled with shortcut desserts and overly complicated recipes, this
classic old fashioned fudge stands out for its honesty and reliability.
It doesn’t rely on artificial thickeners or trendy techniques. Instead, it honors
time-tested methods that consistently produce exceptional results.
The flavor is bold yet balanced, the texture is smooth without being greasy, and the process
itself is approachable for both beginner and experienced bakers. It’s a recipe that invites
you to slow down, engage with the process, and take pride in creating something from scratch.
This is the kind of dessert that becomes part of family tradition. Once you make it,
it’s almost guaranteed someone will ask for the recipe—and once they try it, they’ll
never forget it.
Final Thoughts: Simple, Timeless, and Unforgettable
This old fashioned chocolate fudge proves that the best desserts don’t need
fancy ingredients or complicated steps. With just a handful of pantry staples and a little
attention, you can create a treat that feels luxurious, comforting, and deeply satisfying.
Whether you’re making it for holidays, gifting it to loved ones, or simply treating yourself,
this fudge delivers rich flavor, perfect texture, and a sense of nostalgia that modern desserts
often lack. It’s quick, reliable, and endlessly rewarding.
Once you try it, this recipe won’t just become a favorite—it will become a classic you return
to again and again.