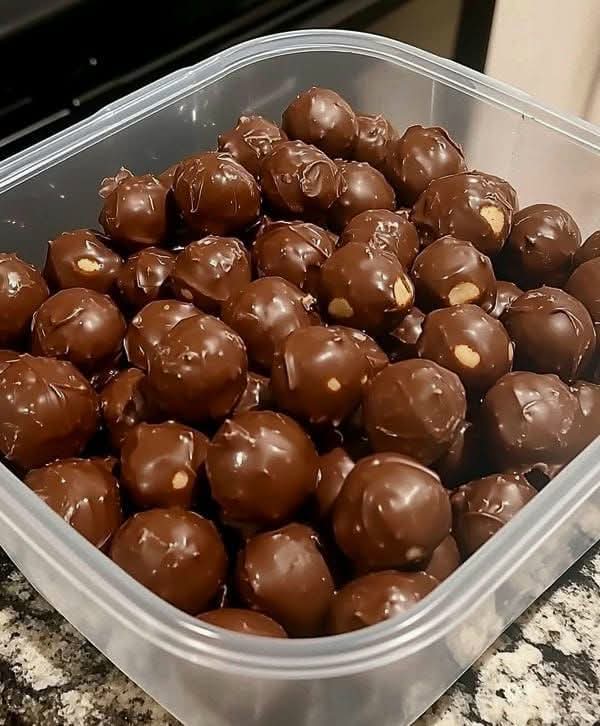
No-Bake Chocolate Peanut Butter Balls
If you’re craving a creamy, chocolatey, and melt-in-your-mouth treat that’s incredibly quick to make, these No-Bake Chocolate Peanut Butter Balls are your ultimate solution. Perfect for snacks, lunchboxes, holiday parties, or last-minute dessert cravings, they combine just three simple ingredients into a rich and indulgent bite-sized delight. Whether you’re a beginner or an experienced cook, this recipe guarantees effortless, irresistible results every time.
Ingredients & Their Roles
- Peanut Butter: Serves as the creamy, nutty base of the balls. It provides richness and structure, ensuring the mixture holds together while delivering a satisfying flavor. For a healthier option, choose no-sugar-added or natural peanut butter, which gives a cleaner taste and fewer calories without sacrificing texture.
- Light Whipped Topping: Introduces airiness and lightness to the dense peanut butter. This ingredient is essential for creating that melt-in-your-mouth texture that makes these treats so addictive. It also softens the overall consistency, making it easier to shape the balls without cracking.
- Sugar-Free Chocolate Chips: Adds deep chocolate flavor with fewer calories and sugar. When melted, they create a glossy, smooth coating that encases the peanut butter core, giving the treats a professional, polished look. Opt for high-quality chocolate chips for best flavor and texture.
Why This Recipe Is Loved
These No-Bake Chocolate Peanut Butter Balls are loved for their simplicity, convenience, and universal appeal. With only three ingredients, you can whip up a batch in less than 20 minutes. Unlike baked desserts, there’s no need to preheat an oven, making them perfect for hot summer days or quick holiday treats. Kids love them because they’re fun to shape and decorate, and adults appreciate the rich, indulgent flavor without the fuss of a traditional dessert.
Pro Tips for Perfect Results
- Use room-temperature peanut butter for easier mixing and smoother texture.
- If the mixture is too soft to roll, chill it for 10-15 minutes in the fridge before shaping.
- For an extra festive touch, sprinkle crushed nuts, cocoa powder, or holiday sprinkles on top before the chocolate sets.
- Melt chocolate carefully in 30-second intervals to prevent burning, stirring between intervals until completely smooth.
- Store finished balls in an airtight container in the refrigerator for up to a week, or freeze for longer storage.
Step-by-Step Instructions for No-Bake Chocolate Peanut Butter Balls
Now that you understand the ingredients and their importance, let’s dive into the step-by-step process for making these irresistible treats. Each step is designed to ensure perfect texture, flavor, and presentation.
Step 1: Prepare Your Workstation
Before you start, gather all your ingredients and tools. You’ll need a medium mixing bowl, a spatula, a microwave-safe bowl, a baking sheet, and parchment paper. Lining the baking sheet with parchment paper ensures the balls won’t stick and makes cleanup effortless. Organizing your workspace ahead of time makes the process smoother and prevents mistakes.
Step 2: Combine Peanut Butter and Whipped Topping
In a medium bowl, combine the peanut butter and light whipped topping. Use a spatula or electric hand mixer to fold the whipped topping gently into the peanut butter until fully incorporated. The mixture should be smooth, fluffy, and slightly airy, making it easy to form into balls. This step is crucial for achieving the soft, melt-in-your-mouth texture.
Step 3: Shape the Peanut Butter Mixture
Once the mixture is ready, use a tablespoon or small cookie scoop to portion out the peanut butter filling. Roll each portion into a perfectly round ball using your hands. If the mixture sticks, lightly dust your hands with powdered sugar or chill the mixture for 10-15 minutes to firm it up. Place the shaped balls onto the parchment-lined baking sheet, ensuring they are spaced evenly to avoid sticking together.
Step 4: Melt the Chocolate Coating
In a microwave-safe bowl, add the sugar-free chocolate chips. Melt them in 30-second intervals, stirring between each interval until smooth and glossy. Optionally, add a tiny splash of coconut oil to the melted chocolate to achieve an even shinier and smoother coating. Avoid overheating, as chocolate can seize if it becomes too hot.
Step 5: Dip the Peanut Butter Balls in Chocolate
Using a fork or dipping tool, carefully dip each peanut butter ball into the melted chocolate, fully coating it. Let the excess chocolate drip off before placing the ball back on the parchment-lined sheet. This creates a beautiful, even chocolate shell while keeping the interior soft and creamy. Repeat until all balls are coated.
Step 6: Chill to Set
Once coated, place the baking sheet in the refrigerator for at least 30 minutes to allow the chocolate to harden completely. For faster results, you can freeze the balls for 10-15 minutes, but avoid freezing too long, as this may alter the texture of the peanut butter filling.
Step 7: Serving Suggestions
Serve these chocolate peanut butter balls *cold or at room temperature. They make perfect additions to holiday dessert platters, lunchboxes, or gift boxes. For an extra festive touch, sprinkle a few chopped nuts, cocoa powder, or holiday sprinkles on top before the chocolate sets. They can also be paired with coffee, milk, or a scoop of vanilla ice cream for a decadent snack.
Pro Tips for Perfection
- Use high-quality sugar-free chocolate chips for a better taste and glossy coating.
- Ensure the peanut butter is at room temperature for easier mixing and rolling.
- If the chocolate hardens too quickly while dipping, reheat gently in the microwave for 10-15 seconds.
- Store leftovers in an airtight container in the fridge for up to a week. They can also be frozen for longer storage.
- Experiment with different nut butters like almond or cashew for variation.
Advanced Tips, Variations, and Finishing Touches for Chocolate Peanut Butter Balls
Now that you’ve mastered the basic preparation and coating, let’s explore how to elevate these treats. This section is designed for home bakers who want their chocolate peanut butter balls to look professional, taste amazing, and impress everyone.
Step 8: Adding Decorative Elements
Once the chocolate shell is slightly set but not fully hardened, consider adding decorative toppings. Sprinkle crushed nuts, mini chocolate chips, or shredded coconut on top. For a festive holiday touch, try colored sprinkles or edible glitter. This step enhances visual appeal and adds texture contrast with the soft peanut butter core.
Step 9: Flavor Variations
While the classic combination is delicious, experimenting with flavors can make your balls even more exciting:
- Mint Chocolate: Add a drop of peppermint extract to the melted chocolate before dipping.
- Salted Caramel: Drizzle a small amount of caramel sauce over the chocolate-coated balls and sprinkle with sea salt.
- Nut Butter Swap: Substitute peanut butter with almond, cashew, or sunflower seed butter for a different flavor profile.
- Protein Boost: Fold a small scoop of chocolate protein powder into the peanut butter mixture for a richer, high-protein version.
Step 10: Storage and Shelf Life
Proper storage ensures your treats remain fresh, creamy, and firm:
- Store in an airtight container in the refrigerator for up to one week.
- For longer storage, freeze the chocolate peanut butter balls for up to one month. Thaw in the fridge for 15-20 minutes before serving.
- Keep them in a single layer or separate layers with parchment paper to avoid sticking.
Step 11: Serving Ideas
These peanut butter balls are versatile and can be enjoyed in multiple ways:
- As a quick snack with a cup of coffee or tea.
- Arranged on a dessert platter for parties or family gatherings.
- Packaged individually in mini cupcake liners for holiday gifts.
- Served alongside vanilla ice cream or fruit for a decadent dessert experience.
Step 12: Troubleshooting Common Issues
Even simple recipes can encounter hiccups. Here’s how to fix common issues:
- Peanut butter mixture too soft: Chill it in the fridge for 10-15 minutes before rolling into balls.
- Chocolate shell cracked: Melt chocolate slightly and dip again for a smoother coat.
- Chocolate seizing: Add a teaspoon of coconut oil or a few drops of cream and stir gently until smooth.
- Balls sticking together: Make sure parchment paper is used, and leave space between balls while chilling.
Step 13: Presentation and Plating
For a professional look, consider the following presentation tips:
- Place balls on a decorative plate or tiered dessert tray for visual appeal.
- Dust lightly with cocoa powder or powdered sugar for contrast against the chocolate shell.
- Use mini cupcake liners to make them easy to pick up at parties or events.
- Group by flavor variations for a colorful, festive display.
By following these extended steps and tips, your No-Bake Chocolate Peanut Butter Balls will not only taste amazing but will also have the look, texture, and professional appeal to impress anyone. Every bite delivers a perfect balance of creamy peanut butter and rich chocolate with a melt-in-your-mouth sensation.
Step 14: Final Coating & Enhancements
For a glossy, professional chocolate finish, consider these tips:
- Melt the chocolate slowly using a double boiler to avoid scorching.
- Dip each peanut butter ball using a fork or dipping tool to ensure even coverage and allow excess chocolate to drip back into the bowl.
- Optional: drizzle white chocolate or caramel over the dark chocolate shell to add contrast and decorative flair.
- For texture, sprinkle finely chopped nuts, toasted coconut, or cocoa nibs immediately after dipping.
Step 15: Perfect Chill and Setting
Achieving the ideal texture requires patience:
- Place chocolate-coated balls on parchment-lined trays.
- Chill in the refrigerator for at least 30 minutes to allow the chocolate to firm and the peanut butter to set.
- For a firmer bite, freeze for 15–20 minutes before serving.
- Serve straight from the fridge for a cool, creamy, melt-in-your-mouth experience.
Step 16: SEO-Optimized Serving Suggestions
To make your dessert experience memorable, try these ideas:
- Pair with a hot cup of coffee, espresso, or chai tea for a comforting afternoon snack.
- Arrange in mini cupcake liners and serve on a platter at parties for easy grab-and-go enjoyment.
- Create a holiday gift set by packaging the balls in decorative tins or jars with ribbons.
- Serve alongside fresh berries or fruit salad for a refreshing contrast to the rich chocolate and peanut butter.
Step 17: Pro Tips for Perfection
- Use room-temperature peanut butter to ensure smooth mixing with whipped topping.
- If the chocolate coating becomes too thick, gently warm it in 10-second increments in the microwave to regain a silky texture.
- For a sweeter twist, mix a tiny amount of honey or maple syrup into the peanut butter filling.
- Always seal leftovers in an airtight container to maintain freshness and prevent moisture absorption.
Step 18: Persuasive Summary & SEO-Friendly Conclusion
These No-Bake Chocolate Peanut Butter Balls combine rich chocolate, creamy peanut butter, and effortless preparation into a dessert that’s both indulgent and approachable. Their versatility, quick assembly, and customizable flavors make them a hit for holidays, parties, snacks, or last-minute gifts. By following this detailed, step-by-step guide, anyone can create perfectly balanced, irresistible treats that are guaranteed to impress. Whether you’re a seasoned baker or a beginner, this recipe offers simplicity, reliability, and gourmet flavor without the hassle. Indulge yourself or share with loved ones—the combination of chocolatey richness and nutty creaminess ensures these peanut butter balls will disappear fast, making them a standout in your dessert repertoire.