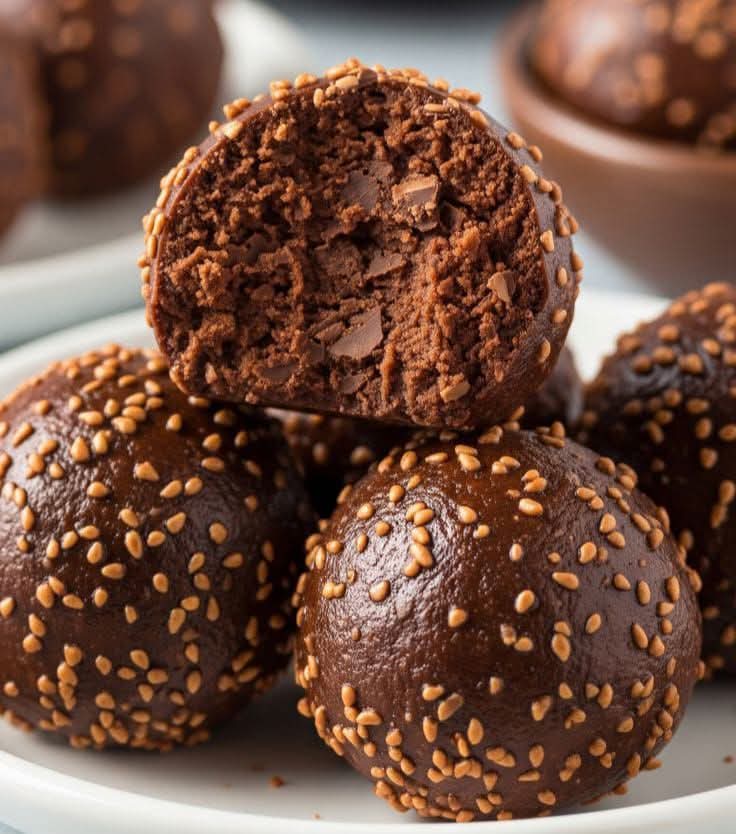
Decadent Chocolate Rum Balls — No-Bake Indulgence
If you’re searching for a dessert that’s effortless, elegant, and incredibly irresistible, look no further than these Chocolate Rum Balls. Packed with deep chocolate flavor, a luxurious splash of rum, and a perfect melt-in-your-mouth texture, this recipe transforms simple ingredients into bite-sized indulgences. Perfect for the holidays, gifting, or simply satisfying a sweet craving, these rum-infused chocolate treats require zero baking and come together in minutes.
Why This Rum Ball Recipe Works
- Effortless preparation: No-bake, requiring minimal hands-on time.
- Complex flavor in minutes: Dark chocolate, rum, and nuts create a multi-layered taste experience.
- Makes a perfect gift: Bite-sized elegance that’s easy to package and share.
- Improves with time: Flavors intensify after resting, giving a richer, more cohesive taste.
Ingredients & Their Roles
Understanding the function of each ingredient ensures perfect Chocolate Rum Balls:
- Crushed Vanilla Wafers (2 cups): Form the base, adding structure and a lightly sweet, crumbly texture that binds with cocoa and rum.
- Powdered Sugar (1 cup): Sweetens the mixture evenly and creates a smooth, cohesive consistency for easy rolling into balls.
- Unsweetened Cocoa Powder (¼ cup): Delivers rich chocolate flavor and a dark, appealing color.
- Finely Chopped Pecans or Walnuts (½ cup): Adds crunch, nutty depth, and complements the warm flavor of rum.
- Dark Rum (¼ cup): The star ingredient, giving these treats their signature bold, aromatic flavor. Rum also moistens the mixture and binds it together.
Pro Tips:
- Use high-quality dark rum for the richest flavor and aroma.
- Toast nuts lightly to enhance their flavor before chopping.
- Ensure vanilla wafers are finely crushed for uniform texture.
- Adjust cocoa and sugar ratios slightly to taste, balancing sweetness and chocolate intensity.
Why This Recipe Works Scientifically
Chocolate Rum Balls rely on a few key principles of no-bake confections:
- Dry base: Crushed wafers absorb moisture from rum and cocoa, creating a moldable mixture.
- Binding agent: Rum acts as a liquid binder, holding the dry ingredients together without baking.
- Flavor infusion: Resting allows the rum, cocoa, sugar, and nuts to meld, intensifying the flavor.
- Textural balance: Nuts provide crunch, cocoa gives richness, and wafers maintain structural integrity.
By mastering the balance of dry and wet ingredients, you can ensure Chocolate Rum Balls are perfectly firm yet tender, with a rich, decadent flavor in every bite.
Step-by-Step Preparation of Chocolate Rum Balls
Step 1: Prepare Ingredients
Crush the vanilla wafers finely using a food processor or by placing them in a sealed plastic bag and rolling with a rolling pin. Chop the pecans or walnuts into small pieces. Measure out the cocoa powder, powdered sugar, and dark rum accurately.
Pro Tips:
- Crush wafers evenly to prevent large chunks in the mixture.
- Lightly toast nuts to enhance flavor and remove excess moisture.
- Use high-quality cocoa for the richest chocolate taste.
Step 2: Mix Dry Ingredients
In a large mixing bowl, combine crushed vanilla wafers, powdered sugar, cocoa powder, and chopped nuts. Mix thoroughly to ensure even distribution. This creates a uniform base that will absorb the rum consistently.
Pro Tips:
- Mix dry ingredients first to prevent clumping when liquid is added.
- For added texture, reserve a small portion of chopped nuts to coat the balls later.
Step 3: Add the Rum
Gradually pour in the dark rum while stirring with a spatula or wooden spoon. The mixture should begin to hold together and form a sticky, moldable dough. If needed, add a small additional splash of rum or milk to achieve the desired consistency.
Pro Tips:
- Do not add too much liquid; the mixture should be firm enough to roll into balls.
- Let the mixture rest for 10–15 minutes; this allows the rum to fully hydrate the dry ingredients.
Step 4: Shape the Rum Balls
Using your hands or a small cookie scoop, form the mixture into uniform bite-sized balls. Roll each ball gently between your palms to create smooth, round shapes.
Pro Tips:
- Lightly dust hands with powdered sugar or cocoa to prevent sticking.
- Ensure all balls are roughly the same size for even coating and presentation.
Step 5: Coat the Rum Balls
For the finishing touch, roll each rum ball in additional powdered sugar, cocoa powder, or finely chopped nuts. This not only enhances visual appeal but also adds extra flavor and texture.
Pro Tips:
- For a festive twist, use colored sanding sugar or drizzle with melted chocolate.
- Press coating gently so it adheres without breaking the ball.
Serving and Presentation Ideas
Chocolate Rum Balls are versatile for gifting or entertaining. Arrange them in decorative tins, mini paper cups, or cellophane bags tied with ribbons. For special occasions, create tiers on a cake stand or scatter them around dessert plates for a luxurious display.
Pro Tips:
- Chill the rum balls for at least an hour before serving to firm up and enhance flavors.
- Pair with coffee, dessert wine, or tea for an elegant presentation.
- Include a small label with flavor and ingredients for gifting.
Storage Guidelines for Chocolate Rum Balls
To maintain the perfect texture and flavor of your Chocolate Rum Balls, store them in an airtight container in the refrigerator for up to 2 weeks. For longer storage, freeze them for up to 3 months. Proper storage ensures they remain firm yet tender and preserves the rich rum and chocolate flavors.
Pro Tips:
- Layer rum balls with parchment paper to prevent sticking.
- Allow frozen rum balls to thaw in the refrigerator overnight for best texture.
- Bring to room temperature for 10–15 minutes before serving to maximize flavor intensity.
Customizations and Flavor Variations
Chocolate Rum Balls are highly versatile. Consider experimenting with the following variations to elevate your recipe:
- Flavored Rums: Use spiced rum, coconut rum, or flavored liqueurs for a unique twist.
- Chocolate Coatings: Dip the balls in melted dark, milk, or white chocolate for extra indulgence.
- Nut Variations: Substitute pecans or walnuts with almonds, hazelnuts, or macadamia nuts.
- Spices and Extracts: Add a pinch of cinnamon, nutmeg, or a few drops of vanilla or almond extract.
- Festive Toppings: Roll in colored sugar, sprinkles, or cocoa powder for holidays and special occasions.
Pro Tips:
- Test small batches of flavor variations before committing the entire recipe.
- Combine textures by rolling in both finely chopped nuts and cocoa for a layered experience.
- Let flavored versions rest for 24 hours for optimal flavor fusion.
Expert Tips and Tricks
- Use a small cookie scoop to ensure uniform-sized rum balls for consistent presentation.
- Gently press balls after rolling to ensure smooth, round shapes without cracks.
- Chill the mixture slightly if it feels too sticky for handling.
- Serve chilled or at room temperature depending on preference; chilling slightly intensifies flavors.
- For gifting, wrap in decorative cellophane bags with ribbons or arrange in elegant tins.
Conclusion — The Ultimate No-Bake Chocolate Indulgence
This Decadent Chocolate Rum Balls recipe provides an effortless, elegant, and irresistibly rich dessert. With simple ingredients and no baking required, these bite-sized treats showcase a perfect balance of chocolate, nuts, and rum in a melt-in-your-mouth texture. By following the step-by-step instructions, storage tips, and flavor variations provided, you can create indulgent, crowd-pleasing treats suitable for gifting, holidays, or everyday enjoyment.
Whether classic, dipped in chocolate, or enhanced with festive toppings, Chocolate Rum Balls are a timeless favorite that delivers luxurious flavor with minimal effort. Master this recipe, and you’ll have a versatile, decadent dessert that impresses every time.