Christmas Butter Cookies — The Ultimate Holiday Guide
Introduction: The Heartwarming Tradition of Butter Cookies
Nothing evokes the spirit of Christmas quite like the aroma of freshly baked butter cookies wafting through your home. These cookies are a staple of holiday traditions across the globe. In Europe, butter cookies have been a festive classic for centuries, especially in countries like Denmark and Germany, where families gather to bake intricate shapes during the holiday season. In North America, the tradition was embraced by early settlers and became synonymous with family gatherings, holiday cookie swaps, and gift-giving. Each bite of a Christmas Butter Cookie embodies not just flavor, but memory — the nostalgia of a grandparent’s kitchen, the warmth of family traditions, and the joy of sharing handmade treats.
In this guide, we are not just providing a recipe; we are sharing a comprehensive journey into creating perfect Christmas Butter Cookies. From selecting the best ingredients to mastering advanced decorating techniques, every detail is covered. By the end of this guide, you will have not only learned how to bake cookies but also how to create a holiday masterpiece worthy of any festive table.
A Personal Story:
As a child, I remember sneaking into the kitchen to watch my grandmother roll out cookie dough, the scent of vanilla and butter filling the air. We would cut out stars, bells, and trees, decorating each cookie with colorful sprinkles and icing. Those moments taught me that baking is not just about food — it is about creating memories, traditions, and joy that lasts a lifetime.
Ingredients and Their Roles in Detail
Understanding each ingredient allows you to manipulate the cookie’s texture, flavor, and appearance. Here’s an in-depth look at why each component is essential:
- All-purpose flour (2 1/2 cups / 312g): The backbone of your cookie. Provides structure and stability, allowing the cookies to hold their shape. Different brands and protein levels affect spread and tenderness.
- Unsalted butter (1 cup / 227g), softened: Butter provides flavor, moisture, and tenderness. The water content in butter interacts with flour proteins to create a delicate crumb. Softened, not melted, butter allows proper aeration when creamed with sugar.
- Granulated sugar (3/4 cup / 150g): Sweetness and texture. Sugar crystals help incorporate air during creaming, contributing to light, airy cookies. Sugar also caramelizes at the edges for that perfect golden hue.
- Egg (1 large): Acts as a binder and adds richness. Eggs contain lecithin, which helps emulsify fats and liquids, creating uniform dough.
- Vanilla extract (1 teaspoon): Enhances flavor and aroma. Pure vanilla extract elevates the buttery flavor, while artificial vanilla can work in a pinch but lacks depth.
- Baking powder (1/2 teaspoon): Provides slight leavening to give a tender lift without excessive puffing.
- Salt (1/4 teaspoon): Balances sweetness, enhances butter flavor, and prevents flat cookies.
- Optional toppings: Sprinkles, sanding sugar, royal icing, chocolate drizzle, or fondant for decoration.
Pro Tips:
- High-quality butter is non-negotiable for rich flavor.
- Measure flour correctly using spoon-and-level to avoid dry cookies.
- Eggs at room temperature integrate smoothly.
- Softened butter should be firm yet pliable; over-softened butter causes excessive spread.
- Optional toppings can be applied before or after baking depending on desired effect.
Step-by-Step Instructions: Preparing the Dough
Step 1: Preheat Oven
Preheat your oven to 350°F (175°C). Position racks in the center to ensure even heat. Line baking sheets with parchment paper or silicone mats for smooth, uniform baking and easy removal.
Step 2: Cream Butter and Sugar
In a large bowl, beat softened butter with granulated sugar for 2–3 minutes until light and fluffy. Proper creaming incorporates air into the dough, creating a tender texture and helping cookies hold shape.
Expert Tip:
Use a stand mixer with a paddle attachment for even creaming. Scrape down the bowl sides periodically to ensure all butter and sugar are incorporated.
Step 3: Add Egg and Vanilla
Beat in the egg until fully incorporated, then add the vanilla extract. Room temperature eggs integrate more easily, ensuring smooth, uniform dough.
Step 4: Combine Dry Ingredients
In a separate bowl, whisk together flour, baking powder, and salt. Sifting is optional but can yield lighter cookies.
Step 5: Form the Dough
Gradually fold dry ingredients into the butter mixture until just combined. Overmixing develops gluten, resulting in tougher cookies. Dough should be soft, slightly sticky, and manageable.
Step 6: Chill Dough (Optional)
Chill for 30–60 minutes if cutting shapes. Chilling solidifies the butter, reduces spreading, and enhances flavor. Wrap tightly in plastic to prevent drying.
Step 7: Roll and Shape
Roll dough to 1/4-inch thickness. Use cookie cutters to create festive shapes. Leave at least 1–2 inches between cookies for expansion. For uniform thickness, use rolling pin guides.
Advanced Tip:
Use a thin spatula to transfer delicate shapes. Decorate with sugar or sprinkles before baking for subtle color and shine.
Baking the Cookies
Step 8: Bake
Bake for 10–12 minutes until edges are lightly golden and centers remain pale. Rotate sheets halfway through for even baking. Correct baking ensures crisp edges with tender centers.
Step 9: Cooling
Cool on baking sheet 3–5 minutes, then transfer to wire racks. This prevents condensation and keeps cookies crisp.
Expert Tip:
Use a thin spatula to avoid breaking delicate cookies. Avoid leaving cookies on hot sheets too long to prevent overbaking.
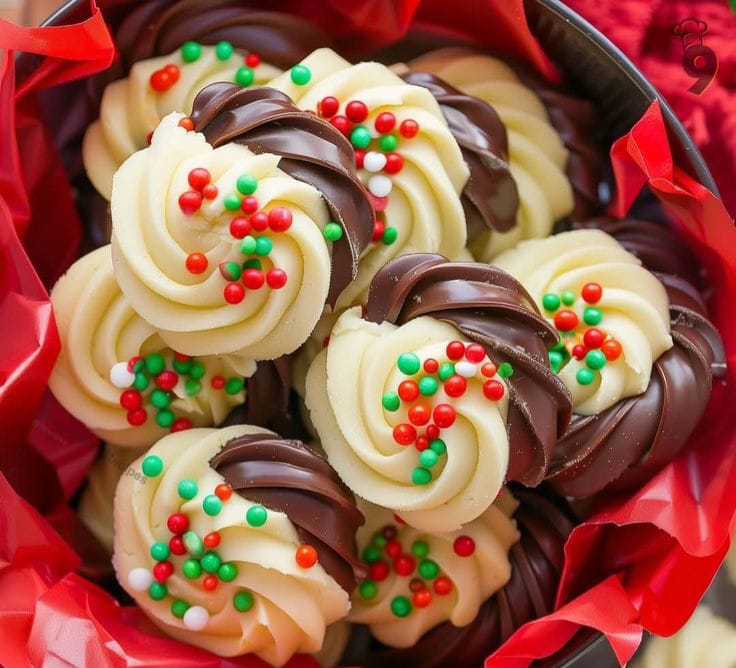
Decorating Ideas
- Royal Icing: Smooth icing for intricate patterns.
- Sprinkles and sanding sugar: Quick festive touches.
- Chocolate drizzle: Adds flavor contrast.
- Fondant: For professional presentation.
- Layered colors: Create 3D effects and festive designs.
- Glitter and edible decorations: Adds sparkle and holiday magic.
Advanced Techniques
- Pipe multiple layers of icing, allowing each layer to dry.
- Use stencils for consistent patterns.
- Mix textures: drizzle chocolate over icing or sprinkle nuts for depth.
- Color-coordinate designs for themed trays or gift boxes.
Storage and Shelf Life
- Room temperature: Airtight container, 1 week.
- Refrigeration: Up to 2 weeks, bring to room temp before serving.
- Freezing: Up to 3 months. Wrap in parchment and store in freezer-safe containers. Thaw at room temperature before decorating.
Expert Tips:
- Layer cookies with parchment to prevent sticking.
- Store away from humidity to preserve crisp edges.
- Avoid strong odors to prevent flavor transfer.
Serving and Gifting
- Arrange on decorative trays for holiday gatherings.
- Use layered gift boxes with parchment for elegant presentation.
- Individually wrap for stocking stuffers or party favors.
- Label cookies with flavors or messages for a personal touch.
- Mix shapes, sizes, and decoration styles for visually stunning displays.
Common Challenges and Solutions
- Spreading: Chill dough before baking.
- Tough texture: Avoid overmixing flour.
- Uneven browning: Use light-colored sheets, rotate mid-bake, ensure spacing.
- Sticky cookies: Cool completely before decorating or storing.
Conclusion
Christmas Butter Cookies are the epitome of holiday baking. With proper technique, high-quality ingredients, and creative decorations, these cookies can be a centerpiece of festive celebrations, cherished gifts, or a comforting treat. Their buttery aroma, tender centers, crisp edges, and endless decorating possibilities make them timeless and universally adored. By following this comprehensive guide, you can confidently create batches that are both delicious and visually stunning — cookies that will become a holiday tradition for years to come.