Grandma’s Apple Crumb Bars – The Ultimate Comfort Dessert
There’s something special about desserts that come straight from Grandma’s kitchen.
The smell of warm cinnamon and baked apples drifting through the air,
the buttery crumble melting on your tongue, and the sweet nostalgia of family gatherings —
that’s what Grandma’s Apple Crumb Bars are all about. This recipe is a
timeless classic that brings back the magic of homemade baking, filled with the flavors of fall
and the love of generations past.
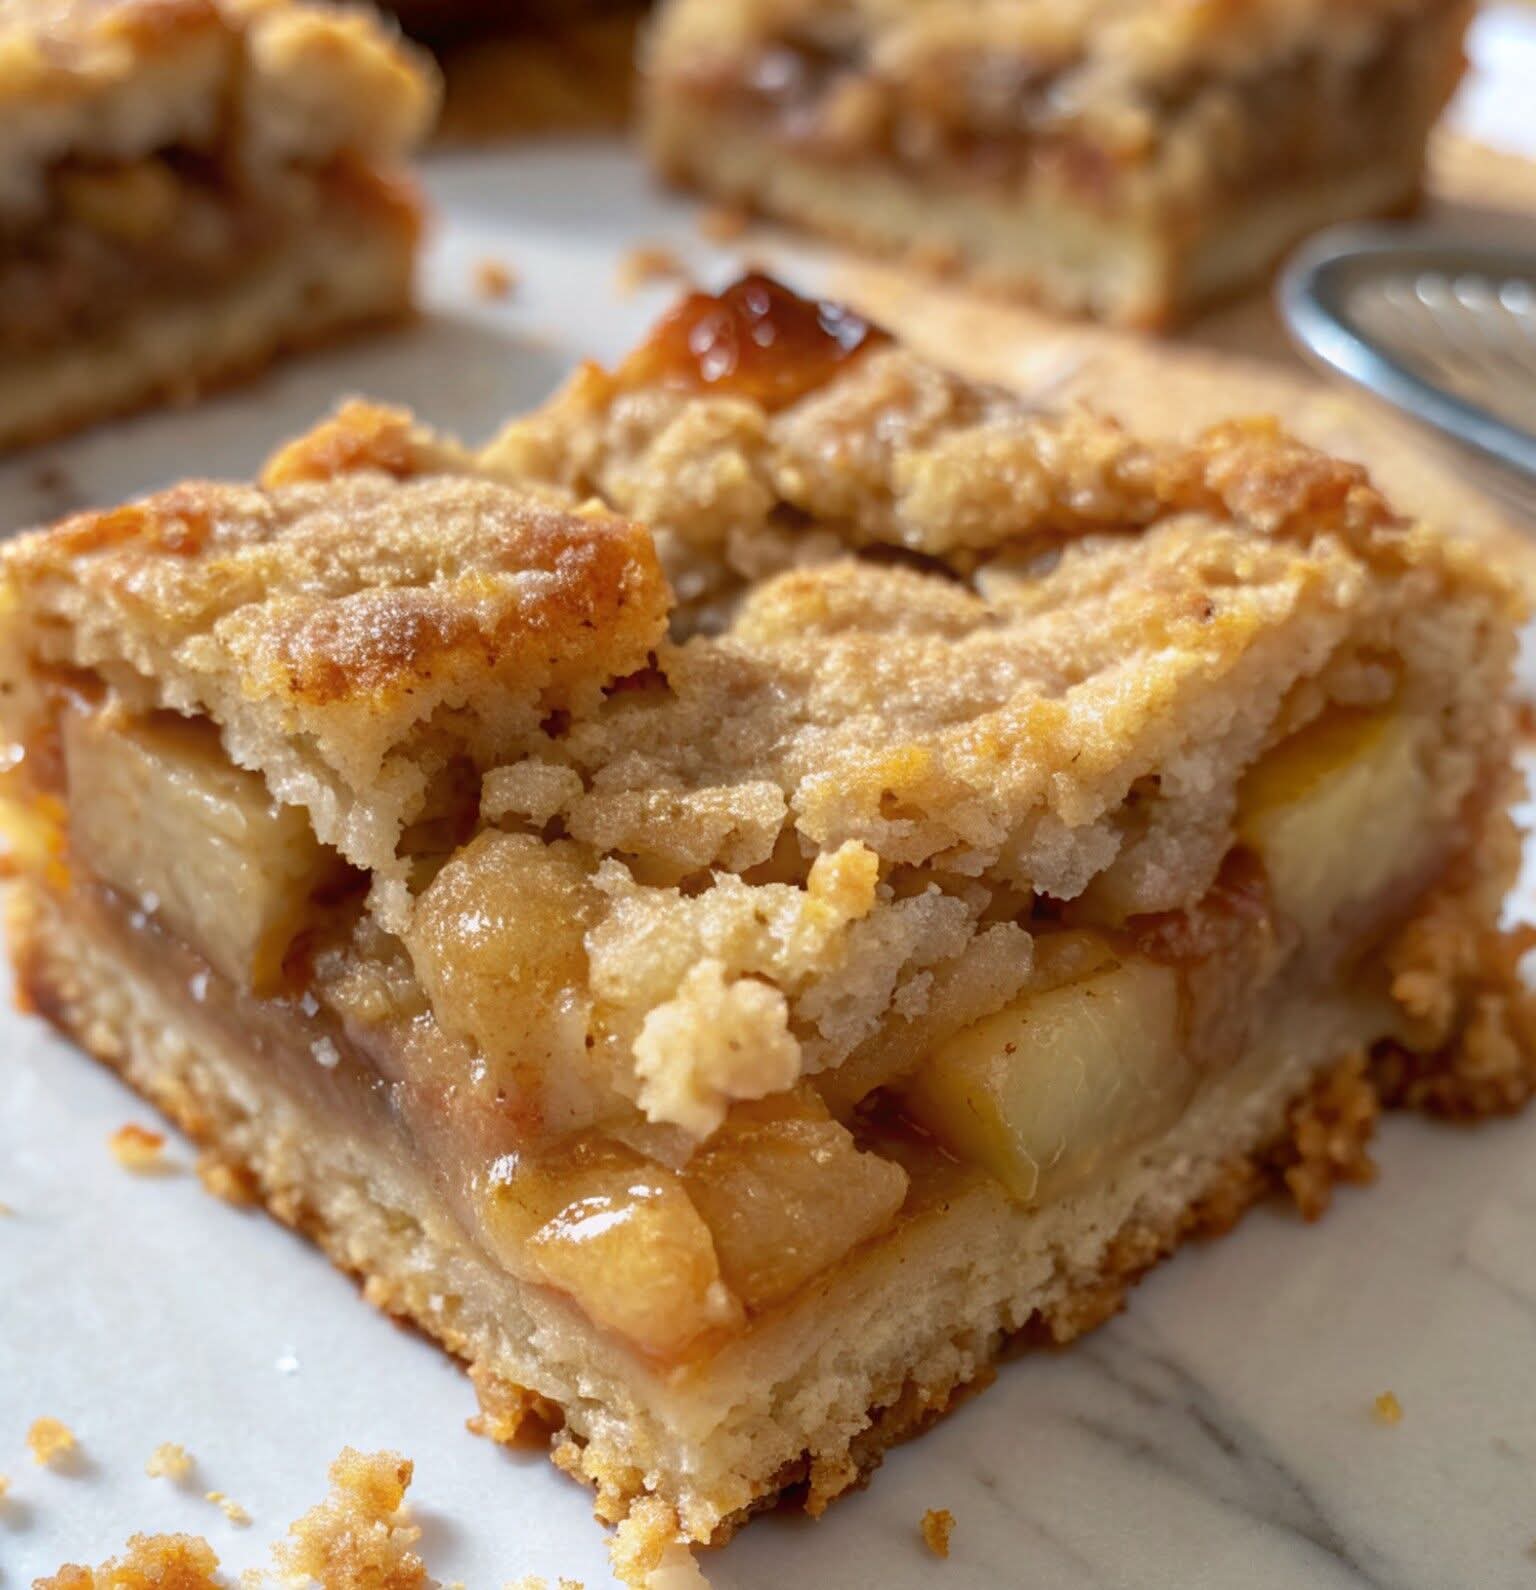
These Apple Crumb Bars combine three irresistible layers: a
buttery shortbread crust, a tender, juicy apple filling,
and a golden crumb topping that turns beautifully crisp in the oven.
The result is a dessert that’s both rustic and elegant — perfect for Sunday dinners,
holidays, or when you simply crave a taste of home. What’s more, this recipe is easy to make,
uses simple pantry ingredients, and delivers bakery-quality results every single time.
Whether you’re baking for your family, taking a tray to a potluck, or looking for a sweet gift idea,
these bars are guaranteed to impress. They cut neatly into squares, pack perfectly in lunchboxes,
and taste just as delicious warm as they do chilled. With their perfect balance of sweet and tart flavors,
and that heavenly buttery crumble, they’re sure to become a cherished favorite in your recipe collection.
Why You’ll Love This Recipe
- Simple ingredients: Everything you need is likely already in your kitchen.
- Comforting flavors: Cinnamon, nutmeg, and apples — the essence of cozy baking.
- Perfect texture: Buttery crust on the bottom, tender apples in the center, and a crisp crumble on top.
- Make-ahead friendly: These bars keep beautifully for days and can even be frozen.
- Versatile serving: Great as a snack, dessert, or paired with morning coffee.
Ingredients & Their Roles
Understanding each ingredient helps you bake with confidence.
Below, you’ll find the list of ingredients with explanations
of what each one contributes to the final texture and flavor.
For the Crust & Crumb Topping
- All-purpose flour (2½ cups): The structural backbone of the recipe. It gives the crust and topping their shape and crumbly bite.
- Granulated sugar (1 cup): Sweetens the base while helping create a tender texture and golden color as it bakes.
- Baking powder (½ teaspoon): Provides a subtle lift that keeps the crust from becoming too dense.
- Ground cinnamon (½ teaspoon): Adds warmth and depth, enhancing the natural sweetness of the apples.
- Cold unsalted butter (1 cup, cubed): The secret to a flaky, melt-in-your-mouth crumb. Cold butter pieces steam slightly in the oven, creating layers of tenderness.
- Large egg (1): Acts as a binding agent to bring the crust and crumbs together without making them dry or cakey.
The magic happens when you mix these ingredients together —
the cold butter turns the flour mixture into a coarse crumble that doubles as both the base and topping.
When pressed into the pan, it forms a sturdy yet buttery foundation for the apple filling.
For the Apple Filling
- Apples (5 cups, peeled and diced): The star of the show. Choose firm varieties like Granny Smith, Honeycrisp, or Fuji for the perfect sweet-tart balance and texture that holds up during baking.
- Granulated sugar (½ cup): Brings out the natural sweetness of the apples without overpowering them.
- All-purpose flour (2 tablespoons): Thickens the filling so it’s luscious but not watery once baked.
- Ground cinnamon (½ teaspoon): A classic pairing with apples that adds warmth and aromatic depth.
- Ground nutmeg (¼ teaspoon): Optional, but just a pinch elevates the filling with that nostalgic, holiday flavor.
This filling is as simple as tossing everything together in a bowl —
no precooking required. The apples soften beautifully in the oven,
creating a luscious layer that’s sweet, spiced, and perfectly balanced
between tender and slightly crisp.
Combined, these ingredients create an unforgettable dessert:
buttery, crumbly, and packed with apple goodness in every bite.
Step-by-Step Instructions for Perfect Apple Crumb Bars
Now that you’ve gathered all your ingredients, it’s time to bring the magic together.
Follow these detailed instructions for a batch of warm, buttery, apple-studded crumb bars
that taste like they came straight from Grandma’s oven.
Each step includes professional tips to help you bake with confidence and get flawless results every single time.
-
Preheat the Oven & Prepare Your Pan
Begin by preheating your oven to 350°F (175°C).
Proper preheating ensures even baking and helps your crust set beautifully before the filling softens.
Lightly grease a 9×13-inch baking pan with butter or nonstick spray.
For easy removal later, line the bottom and sides with parchment paper,
leaving an overhang on two sides — this acts like little handles for lifting out the cooled bars.Pro Tip: Avoid dark metal pans, as they tend to brown the crust too quickly.
A light aluminum or glass pan produces the most even golden finish. -
Make the Crust & Crumb Mixture
In a large mixing bowl, whisk together the flour, sugar, baking powder, and cinnamon
until well combined. This step distributes the leavening and spice evenly throughout the mixture.Next, add the cold cubed butter. Using a pastry cutter, fork, or your fingertips,
cut the butter into the dry ingredients until it resembles coarse, sandy crumbs
with small pea-sized bits of butter still visible. These pockets of butter will create
the irresistibly flaky and crumbly texture once baked.Stir in the egg until the mixture starts to clump together.
The dough should remain somewhat crumbly but moist enough to hold its shape when pressed between your fingers.Grandma’s Wisdom: Don’t overmix — the less you handle the butter, the lighter your crumb will be!
-
Press Half the Mixture into the Pan
Take about half of the crumb mixture and gently press it into the bottom of your prepared pan.
Use the flat bottom of a measuring cup or your hands to create an even layer, ensuring the crust extends all the way to the edges.You want it firm enough to hold the filling but not compacted to the point of becoming hard once baked.
This bottom layer forms a buttery, melt-in-your-mouth base that supports the apple filling perfectly.Set the remaining crumb mixture aside — it will become the golden topping later.
-
Prepare the Apple Filling
In another large bowl, combine the diced apples with sugar, flour, cinnamon, and nutmeg.
Toss everything together until each piece of apple is evenly coated in the sweet, spiced mixture.
The flour works like a thickener here — as the bars bake, it absorbs the apple juices,
creating a rich, jammy filling rather than a watery one.Pro Tip: If your apples are very juicy, sprinkle in an extra tablespoon of flour.
For deeper caramel notes, substitute half of the sugar with light brown sugar.Taste a piece of apple before baking — if it’s too tart, add another tablespoon of sugar to balance it out.
-
Layer the Filling Over the Crust
Spread the apple mixture evenly over the pressed crust.
Make sure to distribute the apples right up to the corners so that every slice is packed with fruit.
You’ll notice the vibrant contrast between the pale buttery crust and the cinnamon-speckled apple layer —
this is the heart of your dessert.Don’t press the apples down too hard; let them rest naturally.
As they bake, they’ll release steam that softens them to perfection. -
Add the Crumb Topping
Take the remaining half of your crumb mixture and sprinkle it generously over the apples.
Crumble it loosely with your fingers to form uneven chunks — that’s what gives these bars
their rustic, bakery-style look.For an extra golden finish, lightly sprinkle the top with a tablespoon of sugar or drizzle
with a little melted butter before baking.Optional Upgrade: Add a handful of chopped walnuts, pecans, or oats into the topping mixture
for added crunch and flavor depth. -
Bake to Golden Perfection
Place your pan in the preheated oven and bake for 40–45 minutes,
or until the top turns golden brown and the apples bubble gently around the edges.
The aroma will fill your kitchen with notes of butter, sugar, and cinnamon — pure nostalgia.Once baked, remove the pan from the oven and let it cool completely on a wire rack.
This is important! Cooling allows the filling to set and the crumb to firm up,
ensuring clean, beautiful slices when you cut it later.Pro Tip: For cleaner cuts, refrigerate the cooled bars for 30 minutes before slicing.
-
Slice and Serve
Once fully cooled, lift the bars out of the pan using the parchment paper overhang.
Place on a cutting board and slice into neat squares or rectangles.
You’ll see the beautiful layers: buttery crust, spiced apple filling, and golden crumble on top —
a feast for both eyes and taste buds.Serve them as-is, or take them to the next level with a dollop of whipped cream
or a scoop of vanilla ice cream.
Every bite melts into a blend of sweet apples, buttery crumbs, and cozy spices —
a dessert that’s as comforting as a hug from Grandma herself.
These detailed steps guarantee success, even if you’ve never made crumb bars before.
Once you’ve baked them once, you’ll understand why this recipe has stood the test of time.
It’s simple, reliable, and most importantly — irresistibly delicious.
Pro Tips for Perfect Apple Crumb Bars
Baking may be simple, but small details make a big difference when it comes to texture and flavor.
These tips ensure your Grandma’s Apple Crumb Bars turn out beautifully every time —
perfectly golden, delightfully buttery, and never soggy.
- Choose the right apples: Not all apples behave the same when baked.
For the best results, combine tart and sweet varieties — like Granny Smith for structure
and Honeycrisp or Fuji for natural sweetness.
This mix gives your bars balance and body without turning mushy. - Keep your butter cold: Cold butter is key to creating that signature crumbly texture.
If your butter softens too much, pop the mixture into the fridge for 10 minutes before pressing the crust. - Don’t skip the parchment paper: It’s your best friend for lifting the bars out cleanly
and preventing sticking. You’ll thank yourself when it’s time to slice. - Measure accurately: Use a spoon to scoop flour into your measuring cup, then level it off with a knife.
Too much flour makes the bars dry, while too little can make them greasy or fall apart. - Cool completely before cutting: Patience pays off!
Warm bars tend to crumble, but once cooled, they slice cleanly into perfect squares. - Add a finishing touch: Before baking, sprinkle a little coarse sugar on top for a sweet,
subtle crunch that sparkles when the bars come out of the oven. - Bonus flavor boost: A tiny squeeze of lemon juice in the apple filling brightens the flavors
and keeps the apples from browning while you prepare everything else.
Serving Suggestions
These crumb bars are one of those desserts that fit in anywhere —
from cozy family dinners to elegant holiday dessert tables.
Their versatility makes them the perfect treat for every occasion.
- Classic Style: Serve slightly warm with a generous scoop of
vanilla ice cream and a drizzle of caramel sauce
for a comforting, old-fashioned dessert. - Breakfast Treat: Enjoy a small square with your morning coffee or tea.
The buttery crust and apple-cinnamon filling pair beautifully with a dark roast or chai. - Fall Party Favorite: Cut into bite-sized pieces and serve on a platter
dusted with powdered sugar. Guests will love the nostalgic flavor and the easy, mess-free bites. - Special Touch: Add a small dollop of whipped cream and a sprinkle of ground cinnamon
just before serving to make them presentation-ready.
These bars also travel exceptionally well — pack them for picnics, potlucks, or bake sales.
They hold their shape beautifully and don’t require refrigeration, making them
a convenient and crowd-pleasing dessert for any outing.
Variations & Creative Twists
Once you’ve mastered the classic recipe, you can experiment with different flavor combinations.
Here are some fun and delicious ideas that build on the timeless base:
- Apple-Pear Fusion: Replace half of the apples with chopped pears
for a sweeter, juicier twist that adds a soft, floral aroma. - Brown Sugar Crumb Bars: Substitute half of the white sugar
with light brown sugar in both the crust and filling for a deeper, caramel-like flavor. - Caramel Apple Bars: Drizzle caramel sauce between the apple layer and crumb topping
before baking for an indulgent dessert that tastes like caramel apple pie in bar form. - Nutty Delight: Add ½ cup of chopped pecans or walnuts to the crumb topping
for extra crunch and an earthy note that complements the sweetness of the apples. - Oat Crumble Version: Replace ½ cup of flour in the topping with old-fashioned oats
for a chewy, rustic variation that adds fiber and flavor. - Spiced Autumn Bars: Mix in a pinch of ground cloves or allspice to enhance the warm,
seasonal spice profile. - Glazed Finish: Once cooled, drizzle a simple glaze made of powdered sugar and milk
over the top for a bakery-style finish.
No matter which variation you choose, the key to perfection remains the same —
keep your butter cold, balance your flavors, and let love guide your baking.
Storage & Make-Ahead Tips
One of the best things about Grandma’s Apple Crumb Bars
is how well they store. You can easily make them ahead for gatherings, holidays, or meal prep.
- At room temperature: Store the cooled bars in an airtight container for up to 3 days.
Keep parchment paper between layers to prevent sticking. - In the refrigerator: These bars last up to 1 week in the fridge.
Simply warm them in the microwave for 10–15 seconds before serving to restore that fresh-from-the-oven flavor. - In the freezer: Wrap bars tightly in plastic wrap and place in a freezer-safe container.
They’ll keep beautifully for up to 3 months.
Thaw overnight in the refrigerator or at room temperature for a few hours before serving. - Reheating tip: To revive leftover bars, heat in a 300°F (150°C) oven for 5–7 minutes.
This crisps up the crumb topping and makes your kitchen smell heavenly all over again.
Why Everyone Loves Grandma’s Apple Crumb Bars
These bars are more than just a dessert — they’re a tradition.
Every bite carries the warmth of cinnamon, the tenderness of baked apples,
and the melt-in-your-mouth comfort of buttery crumbs.
It’s a recipe that’s been passed down through generations,
standing the test of time because it delivers everything we love about homemade baking:
simplicity, flavor, and nostalgia.
Easy enough for beginners and rewarding enough for seasoned bakers,
Grandma’s Apple Crumb Bars are the kind of recipe you’ll want to print,
save, and share with loved ones. Serve them at holidays, bake them on a rainy day,
or enjoy one quietly with your morning coffee —
each square tells a story of home, warmth, and love.