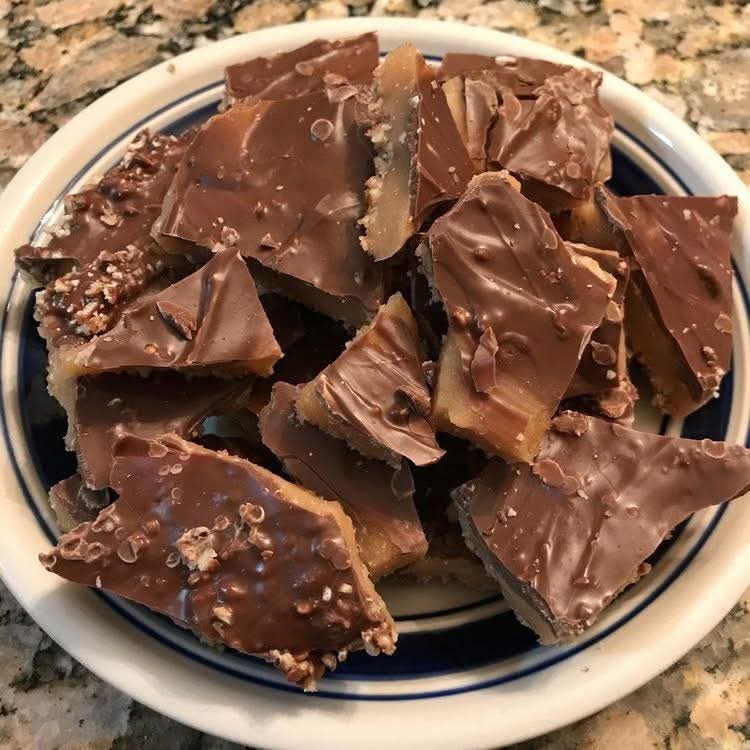
Better Than Anything Toffee – The Ultimate Rich, Buttery & Crunchy Candy
Imagine a candy that melts in your mouth, offering a perfect harmony of buttery richness, sweet caramel crunch, and silky chocolate. That’s exactly what Better Than Anything Toffee delivers. This indulgent treat transforms a handful of simple ingredients into a luxurious, show-stopping confection perfect for holidays, gifting, or treating yourself to a decadent snack.
Why This Toffee Is a Crowd-Pleaser
- Simple Yet Extraordinary: Only six main ingredients but delivers gourmet-level flavor and texture.
- Perfect Crunch: Achieve the classic hard-crack stage that gives every bite satisfying snap.
- Nutty & Chocolate Harmony: Toasted pecans and smooth chocolate blend beautifully with buttery toffee.
- Quick Preparation: 20 minutes of active prep and under an hour from start to finish.
- Gift-Ready: Its glossy finish and golden base make it perfect for packaging in tins or boxes.
- Versatile: Serve as a treat, topping, or dessert addition.
Ingredients & Their Role
Understanding each ingredient is key to perfect results:
- 1 cup coarsely chopped pecans: Adds a nutty crunch and rich flavor. Toast lightly for deeper aroma.
- 1 cup unsalted butter (2 sticks): Forms the base. High-quality butter ensures a rich, creamy flavor and smooth texture.
- 1 cup granulated sugar: Caramelizes with butter to create the signature crunchy texture.
- ½ teaspoon kosher salt: Balances sweetness and enhances overall flavor.
- 1 teaspoon vanilla extract: Adds aromatic depth and warm undertones.
- 1 cup milk chocolate chips: Smooth, creamy topping that complements the crunchy base perfectly.
Pro Tips for Perfect Toffee
- Use a heavy-bottomed saucepan to ensure even heat distribution.
- Monitor temperature with a candy thermometer — 290–300°F is the ideal hard-crack stage.
- Pour the hot toffee over the nuts carefully; do not spread immediately — it self-levels for a smooth top.
- Fresh, high-quality pecans and chocolate dramatically improve flavor.
- Work quickly when adding chocolate; residual heat melts it evenly.
- Toast pecans lightly to enhance flavor and aroma.
- Keep all ingredients at room temperature for consistent results.
Equipment You’ll Need
- Heavy-bottomed 3-quart saucepan
- Candy thermometer
- Spatula
- 9-inch square baking dish lined with parchment paper
- Cooking spray
- Mixing bowls
- Measuring cups and spoons
- Optional: Serrated knife for clean cuts
Preparation Overview
In this recipe, you’ll:
- Prepare the pan and layer pecans for a nutty base
- Melt butter and sugar to precise temperature
- Add vanilla for aroma and depth
- Pour over pecans and top with chocolate
- Cool completely and cut into pieces
- Store and present for maximum impact
Now that you understand the ingredients, equipment, and tips, you’re ready to move to the detailed cooking steps in the next part.
Step-by-Step Preparation – Part 1
Step 1: Prepare the Pan and Nuts
Line a 9-inch square baking dish with parchment paper. Lightly spray with cooking spray to prevent sticking. Spread 1 cup of coarsely chopped pecans evenly across the bottom of the pan. For an enhanced flavor, toast the pecans in a dry skillet over medium heat for 3–4 minutes, shaking frequently. Toasting releases natural oils and amplifies the nutty aroma, which perfectly complements the toffee’s buttery sweetness.
Step 2: Melt Butter and Sugar
In a heavy-bottomed 3-quart saucepan, melt 1 cup unsalted butter over medium-low heat. Add 1 cup granulated sugar and ½ teaspoon kosher salt. Stir constantly until the sugar dissolves completely and the mixture becomes smooth. Maintaining a steady, low heat prevents burning and ensures an even caramelization.
Step 3: Boil to Hard Crack Stage
Increase the heat slightly to bring the mixture to a gentle boil. Attach a candy thermometer to monitor the temperature carefully. Stir occasionally to prevent scorching. The toffee reaches the hard crack stage at 290–300°F (143–149°C). This is crucial: achieving the correct temperature ensures the toffee will have that perfect crunchy snap without being too brittle or too soft.
Step 4: Add Vanilla Extract
Once the toffee reaches the hard crack stage, immediately remove the saucepan from heat. Stir in 1 teaspoon of vanilla extract. This step infuses the caramel with a warm, aromatic undertone, balancing the sweetness and highlighting the butter’s richness.
Step 5: Pour the Toffee Over the Nuts
Carefully pour the hot toffee mixture over the prepared pecans in the pan. Do not spread it immediately; let it self-level naturally. This ensures a smooth, glossy surface and avoids disturbing the nut layer underneath. Use caution — the toffee is extremely hot and can cause burns. Consider wearing heat-resistant gloves if needed.
Step 6: Optional Tips During Pouring
- Pour slowly from one corner and allow the mixture to flow naturally for even coverage.
- If small air bubbles form, gently tap the pan on the countertop to release them and achieve a flawless top layer.
- For a more rustic look, you can gently tilt the pan to spread without using a utensil.
At this stage, the base of your toffee is complete. The next step involves topping it with chocolate and finishing touches, which we will cover in the next, equally detailed and extensive batch.
Step-by-Step Preparation – Part 2
Step 7: Add the Chocolate
Immediately after pouring the hot toffee over the pecans, sprinkle 1 cup of milk chocolate chips evenly over the surface. The residual heat from the toffee will gently melt the chocolate. Cover the pan loosely with foil and let it sit undisturbed for 5 minutes. This allows the chocolate to melt uniformly without the need for additional heat, preserving a smooth, glossy finish.
Step 8: Spread the Chocolate
After 5 minutes, remove the foil. Use a spatula to gently spread the melted chocolate evenly over the toffee layer. Work carefully — the toffee beneath is still hot. For a perfectly even coating, use long, smooth strokes, but avoid pressing too hard to prevent breaking the toffee base.
Step 9: Cooling the Toffee
Allow the toffee to cool completely at room temperature. This step is crucial for achieving the ideal crunchy texture. If you are in a hurry, refrigerate for 20–30 minutes, but make sure it is fully set before cutting. Avoid touching or moving the toffee during this stage to prevent cracking or uneven surfaces.
Step 10: Breaking and Cutting
Once fully cooled and set, lift the toffee out of the pan using the parchment paper. Break into bite-sized pieces for a rustic look or use a serrated knife for cleaner, professional cuts. For a decorative effect, you can also cut the toffee into uniform rectangles or diamonds. This step transforms your homemade toffee into visually appealing treats ready for serving or gifting.
Step 11: Tips for Perfect Cutting
- Warm the knife slightly in hot water and wipe dry before cutting to reduce sticking.
- For a more polished presentation, score the chocolate lightly before it fully sets and then break along the lines.
- If you want perfectly uniform pieces, use a ruler or template to guide your cuts.
Step 12: Optional Decorative Touches
Enhance the visual appeal and flavor with these additions:
- Sprinkle a pinch of sea salt over the chocolate before it sets for a salted caramel twist.
- Add finely chopped toasted nuts on top of the melted chocolate for extra crunch.
- Use a drizzle of white chocolate in thin lines for a professional, candy-shop look.
- Dust lightly with cocoa powder or powdered sugar for a festive appearance.
With these steps, your toffee is almost ready. The final stage involves serving, storage, and advanced tips for keeping it fresh and delicious — all covered in the fourth and final batch.
Step 13: Serving Your Toffee
Your Better Than Anything Toffee is now ready to enjoy! Here are some ideas to present it beautifully:
- Arrange the toffee pieces on a decorative platter for parties or gatherings.
- Serve alongside coffee, hot chocolate, or tea for an indulgent snack experience.
- Mix small shards into ice cream or yogurt for added texture and flavor.
- Create a dessert board with nuts, fruits, and chocolates, placing the toffee as the centerpiece.
Step 14: Storage Tips
To keep your toffee fresh, crunchy, and flavorful:
- Store in an airtight container at room temperature for up to 2 weeks.
- Separate layers with parchment paper to prevent sticking.
- Refrigerate for up to 1 month for longer storage, ensuring layers are protected from moisture.
- Freeze in airtight containers for up to 3 months. Thaw at room temperature before serving.
- Avoid humid environments as moisture softens the toffee and diminishes crunch.
Step 15: Advanced Tips for Perfection
- Use a heavy-bottomed saucepan to maintain consistent heat and avoid burning.
- Always monitor the temperature with a candy thermometer for precise results.
- For even caramelization, stir slowly and evenly, scraping the sides occasionally.
- Work quickly when adding chocolate to ensure smooth melting without overcooling the toffee.
- Experiment with flavor twists: espresso powder, chili flakes, or orange zest can elevate your toffee.
- Ensure all ingredients are at room temperature before starting for consistent texture.
Step 16: Gifting and Presentation Ideas
This toffee is perfect for homemade gifts. Here’s how to make it extra special:
- Package in festive tins or boxes with parchment paper layers.
- Include a personalized tag or ribbon for a thoughtful touch.
- Mix with other candies or nuts in jars for a gourmet gift experience.
- Decorate the top with drizzled white chocolate or edible gold flakes for a luxurious presentation.
- Perfect for holidays, birthdays, or as a special treat for friends and family.
Step 17: Why This Toffee Stands Out
What makes Better Than Anything Toffee truly exceptional is the combination of textures and flavors: the buttery, golden caramel base, the nutty crunch from toasted pecans, and the smooth, glossy milk chocolate topping. Every bite delivers a satisfying contrast between crisp, creamy, and nutty elements, making it irresistibly indulgent.
Step 18: Final Thoughts
This recipe proves that you don’t need complicated ingredients or techniques to create something extraordinary. With clear steps, professional tips, and a little patience, you can make Better Than Anything Toffee at home that rivals candy-shop quality. Perfect for gifting, sharing, or savoring all by yourself, this toffee truly lives up to its name.
Enjoy the satisfaction of a homemade treat that is crunchy, buttery, nutty, chocolatey, and downright irresistible. Every piece is a testament to your skill in creating a dessert that everyone will love and remember.