Ciabatta Bread – The Ultimate Guide to Crisp Crust & Airy Crumb
There is something magical about the smell of freshly baked bread wafting through your kitchen. It’s comforting, nostalgic, and evokes memories of family gatherings, warm kitchens, and the simple pleasures of life. Among all the breads I’ve baked over the years, ciabatta holds a special place in my heart. Its rustic appearance, crisp crust, and airy interior make it both beautiful and versatile. From sandwiches and bruschetta to simply dipping in olive oil, ciabatta never fails to impress.
I first discovered ciabatta during a trip to northern Italy. Walking through the local bakeries, I was drawn to the large, flour-dusted loaves with irregular holes in their crumb. Each bite had a delicate chewiness, a subtle tang, and a depth of flavor that instantly captivated me. Ever since, I’ve been on a journey to master this iconic bread at home.
The History and Origins of Ciabatta
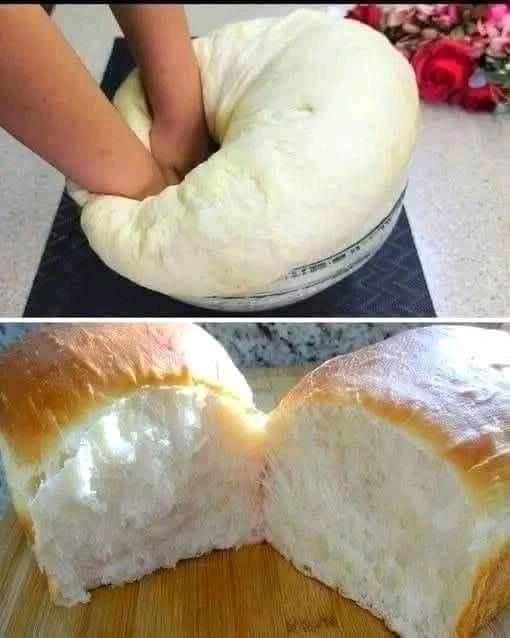
Ciabatta, meaning “slipper” in Italian, was developed in 1982 by Arnaldo Cavallari in Adria, Veneto. It was Italy’s response to the growing popularity of French baguettes. Italian bakers sought to create a bread with a light, open crumb, crispy crust, and rustic shape suitable for sandwiches. Unlike baguettes, ciabatta has a soft interior, a high hydration dough, and irregular holes, giving it its signature texture and artisan appearance.
The magic behind ciabatta’s texture lies in its highly hydrated dough and long fermentation process. Traditional ciabatta often uses a biga—a pre-ferment made the day before baking. The biga develops flavor, strengthens the gluten network, and enhances the final crumb structure. This combination of hydration, fermentation, and gentle handling makes ciabatta both challenging and rewarding to bake.
Why Ciabatta is Special
Ciabatta is unique for several reasons:
- High hydration dough creates large, irregular holes in the crumb.
- Long fermentation adds depth of flavor and aroma.
- Crisp, flour-dusted crust with soft, chewy interior.
- Versatile bread for sandwiches, dipping, or side dishes.
- Artisan appearance makes it visually stunning on any table.
Mastering ciabatta requires patience, but the reward is a loaf that tastes and looks like it came from a professional bakery.
Essential Cooking Tools
- Large mixing bowl: For combining wet and dry ingredients.
- Stand mixer with dough hook (optional): Useful for handling high-hydration dough.
- Bench scraper: Helps with folding and transferring sticky dough.
- Baking sheet, baking stone, or steel: Ensures even heat and proper crust development.
- Parchment paper: Prevents sticking and aids in shaping.
- Sharp knife or lame: For scoring the loaf to control expansion.
- Cooling rack: Prevents soggy bottoms by allowing airflow.
- Kitchen scale: Highly recommended for accurate measurements.
These tools help create a professional-quality loaf at home.
Ingredients and Their Roles
- 500g (4 cups) bread flour: Forms strong gluten structure to trap air and create an open crumb.
- 400ml (1 2/3 cups) water: Hydrates the flour and creates high hydration needed for airy texture.
- 10g (2 tsp) salt: Enhances flavor and strengthens gluten.
- 5g (1 tsp) instant yeast: Provides leavening and starts fermentation.
- Pre-ferment (biga, optional): Enhances flavor complexity, improves texture, and helps dough rise.
- Olive oil (optional, for brushing): Improves crust color and adds subtle flavor.
Step-by-Step Instructions
- Prepare the Biga: Combine 100g flour, 100ml water, and a pinch of yeast. Cover and leave at room temperature overnight for fermentation.
- Make the Dough: In a large mixing bowl, combine remaining flour, water, salt, yeast, and the prepared biga. Mix until sticky and shaggy.
- Bulk Fermentation: Cover the bowl and let dough rise for 1-2 hours until roughly doubled in size.
- Stretch and Fold: Every 30 minutes, gently fold the dough over itself 3-4 times to develop gluten without deflating it.
- Divide and Shape: Lightly flour the surface. Divide the dough into portions and stretch each into a rectangular loaf. Avoid pressing out air bubbles.
- Final Proof: Place loaves on parchment or floured couche. Cover and proof for 45-60 minutes until slightly puffy.
- Preheat Oven: Preheat to 220°C (425°F) with baking stone inside. Optional: Place a pan of water to create steam for a crisp crust.
- Score the Loaves: Make 2-3 diagonal slashes on top to allow controlled expansion.
- Bake: Bake 20-25 minutes until golden brown and crisp. Rotate trays if needed for even color.
- Cool: Transfer to a cooling rack for at least 30 minutes before slicing to preserve airy crumb.
Pro Tips for Perfect Ciabatta
- Handle high hydration dough gently to preserve air pockets.
- Use a preheated baking stone for optimal oven spring.
- Steam in the oven for a shiny, crisp crust.
- Don’t rush cooling; slicing too early will compress the airy interior.
- Experiment with different flours or add-ins like olives, herbs, or seeds for variety.
- Patience is key: longer fermentation = deeper flavor.
Flavor and Seasonal Variations
- Herb Ciabatta: Add rosemary, thyme, or oregano to the dough.
- Olive Ciabatta: Fold in chopped green or black olives before shaping.
- Seeded Ciabatta: Add sunflower, sesame, or pumpkin seeds to the top or inside.
- Garlic & Parmesan: Mix in roasted garlic and grated parmesan for savory flavor.
- Whole Wheat Variation: Substitute part of the flour with whole wheat for nutty taste.
Serving Suggestions
- Slice and serve with olive oil and balsamic vinegar.
- Use for gourmet sandwiches with fresh mozzarella, tomatoes, and basil.
- Toast and spread with avocado, butter, or jam for breakfast.
- Pair with soups, stews, or pasta dishes.
- Include in charcuterie boards for parties.
Why I Love Making Ciabatta
Each loaf is a labor of love. The process teaches patience, technique, and respect for dough. From mixing the biga to the final bake, the journey is as rewarding as the end result. Sharing freshly baked ciabatta with friends and family is a simple yet profound joy. Its aroma fills the kitchen, and its flavor brings smiles to everyone at the table.
Baking ciabatta has become a ritual in my home. On quiet mornings, I start the pre-ferment, and by evening, the bread is golden and ready to enjoy. For family gatherings, I create flavored loaves with herbs or olives. It’s not just bread; it’s a centerpiece that fosters togetherness, conversation, and celebration.
In conclusion, ciabatta is more than just bread—it’s an experience. Its high hydration dough, long fermentation, and rustic beauty make it a rewarding challenge for any baker. With patience, care, and love, you can create loaves with crisp crusts, airy crumbs, and unforgettable flavor. Whether you’re a novice