Ultimate Oklahoma Nut Candy – Classic Caramel & Nut Treat
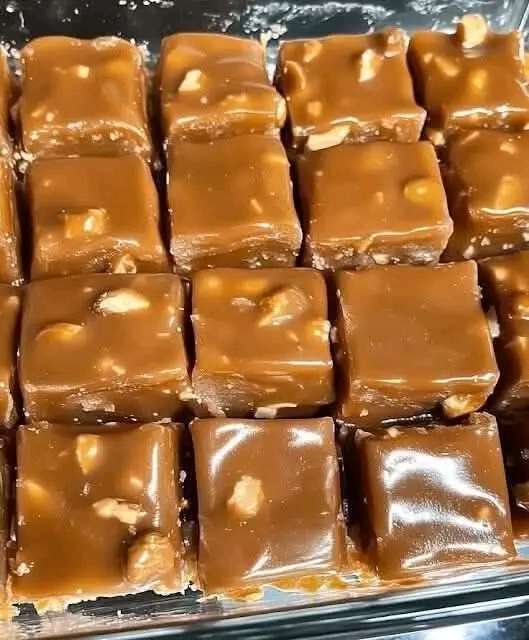
Oklahoma Nut Candy is a classic treat known for its deep caramel flavor, rich nutty texture, and melt-in-your-mouth consistency. Perfect for gifting during holidays or sharing at family gatherings, this candy combines creamy caramel with crunchy walnuts or pecans for an irresistible treat. With this detailed guide, you will learn every step to achieve perfect Oklahoma Nut Candy, along with tips, variations, and presentation ideas.
Why This Candy is a Classic
- Deep Caramel Flavor: Made with a slow sugar melt for rich, buttery taste.
- Creamy, Yet Crunchy: Soft enough to melt in your mouth while retaining the satisfying crunch of toasted nuts.
- Perfect for Gifting: Cut into squares and wrap in festive packaging for holidays or special occasions.
- Family Tradition: This recipe has been shared for generations and continues to impress with its simple, classic flavors.
Ingredients & Their Purpose
- 2 cups heavy cream: Creates the rich, creamy base that balances the sweetness of the sugar.
- 1 ½ cups chopped walnuts or pecans: Adds crunch and nutty flavor; lightly toast for extra aroma.
- ½ cup unsalted butter: Provides richness and smoothness to the caramel.
- 1 teaspoon vanilla extract: Enhances the sweetness and adds warm flavor notes.
- ¼ teaspoon baking soda: Lightens the texture slightly and prevents crystallization in caramel.
- 6 cups granulated sugar (divided 2 cups + 4 cups): Essential for caramel formation; divided to control texture and prevent burning.
Kitchen Tools You’ll Need
- Large heavy-bottom saucepan or Dutch oven
- Wooden spoon or silicone spatula
- Candy thermometer
- 9×13-inch baking dish
- Knife for chopping nuts
- Optional silicone spatula for pouring and spreading caramel
- Heatproof gloves or mitts (for safety)
- Parchment paper (for easier removal of candy)
Step-by-Step Instructions
Step 1 – Prepare Your Baking Dish
Lightly grease a 9×13-inch baking dish or line it with parchment paper. This ensures the candy doesn’t stick and can be removed easily once set. Set aside for later.
Step 2 – Toast the Nuts (Optional)
For maximum flavor, lightly toast the chopped walnuts or pecans in a dry skillet over medium heat for 3–5 minutes until fragrant. Stir constantly to avoid burning. This step enhances the nutty aroma and adds depth to your candy.
Step 3 – Melt the First Portion of Sugar
In a bottomed saucepan over low heat, slowly melt 2 cups of sugar, stirring frequently. This takes about 20 minutes but is crucial for developing deep caramel notes. Be patient: rushing can lead to uneven melting or burning. Aim for a smooth, amber-colored sugar.
Step 4 – Simmer the Cream Mixture
While the sugar melts, combine the remaining 4 cups sugar with heavy cream in a large saucepan over low heat. Stir occasionally to dissolve sugar and prevent sticking. Warm the mixture until it is smooth and uniform.
Step 5 – Combine the Sugars
Once the melted sugar is smooth and fully liquefied, carefully pour it into the cream mixture. Stir constantly to integrate the caramelized sugar with the cream. Work slowly and steadily to prevent crystallization and avoid splattering.
Step 6 – Cook to Softball Stage
Continue cooking the mixture over medium heat, stirring constantly. Use a candy thermometer to monitor the temperature. Cook until it reaches 235–240°F (softball stage). At this stage, a small amount dropped into cold water forms a soft, flexible ball—perfect for soft, chewy caramel candy.
Step 7 – Add Butter, Vanilla, and Baking Soda
Remove from heat and quickly stir in unsalted butter, vanilla extract, and baking soda. The mixture will foam slightly due to the reaction with baking soda. This reaction creates a lighter texture in the candy and gives a smoother finish.
Step 8 – Mix in Nuts
Immediately fold in the toasted nuts, ensuring each piece is coated with the caramel mixture. Work quickly before the caramel begins to harden.
Step 9 – Pour into Prepared Dish
Pour the hot candy mixture into the greased or parchment-lined baking dish. Use a spatula to spread it evenly. Be careful: the mixture is extremely hot.
Step 10 – Cool and Set
Allow the candy to cool at room temperature for 2–3 hours or until fully set. For faster setting, place in the refrigerator for 1–2 hours. Once firm, use a sharp knife to cut into squares or rectangles.
Expert Tips & Tricks
- Use a heavy-bottomed saucepan to prevent scorching.
- Stir constantly when combining sugar and cream to avoid crystallization.
- Wear heatproof gloves when pouring hot caramel.
- Store candy in airtight containers to preserve texture and flavor.
- Add a pinch of sea salt on top for a salted caramel variation.
- Experiment with different nuts like almonds or hazelnuts for unique flavors.
- Ensure your candy thermometer is accurate for perfect results.
Variations & Creative Twists
- Chocolate Drizzle: Melt dark or milk chocolate and drizzle over cooled candy squares for added indulgence.
- Spiced Caramel: Add a pinch of cinnamon or nutmeg for warm, aromatic notes.
- Mixed Nuts: Combine walnuts, pecans, and almonds for diverse texture and flavor.
- Mini Candy Bites: Spoon small portions onto parchment to create bite-sized candies perfect for gifting.
- Layered Candy: Add a thin layer of chocolate before pouring caramel for a layered effect.
Serving Suggestions
- Perfect for gifting during holidays; wrap in cellophane or parchment and tie with a ribbon.
- Serve alongside coffee or hot chocolate for a decadent treat.
- Include in a candy platter for parties or family gatherings.
- Enjoy with ice cream or as a topping for desserts.
Storage & Make-Ahead Tips
- Store in an airtight container at room temperature for up to 2 weeks.
- For longer storage, refrigerate up to 1 month or freeze for up to 3 months.
- Ensure candy is fully cooled before covering to prevent condensation.
- Cut into desired sizes only after candy is fully set for cleaner edges.
Why This Candy is a Family Favorite
The perfect balance of rich caramel and crunchy nuts, combined with the ease of making it at home, has made this recipe a beloved classic. Generations have enjoyed its sweet, nutty, and creamy texture, making it a staple for celebrations and special occasions.
Final Thoughts
With this expanded, step-by-step guide, you now have all the knowledge needed to create the ultimate Oklahoma Nut Candy. From ingredient preparation to caramelization techniques, nut toasting, and precise cooling, this recipe ensures a perfect batch every time. Whether you gift it, serve it at family gatherings, or enjoy it yourself, this candy delivers nostalgic comfort and indulgent flavor with every bite.