Soft Christmas Peppermints: Melt-in-Your-Mouth Holiday Treats
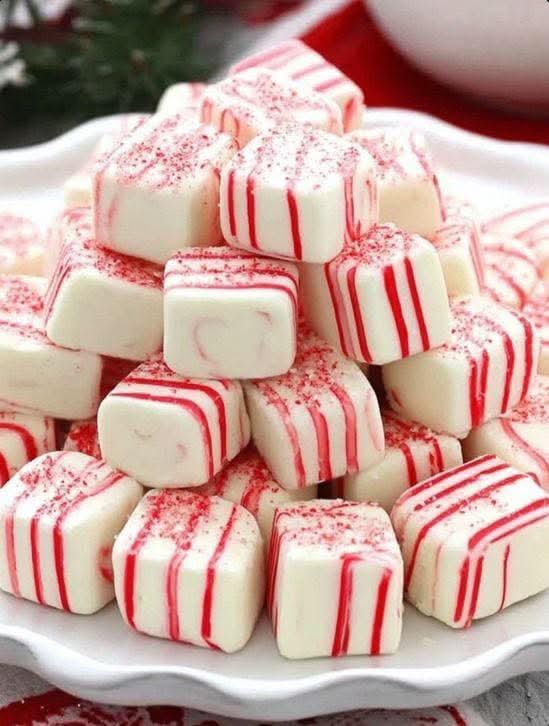
The holiday season is a time for traditions, warmth, and indulgence, and few treats capture that festive spirit quite like Soft Christmas Peppermints. These classic, old-fashioned butter mints are more than just a sweet—they are a symbol of family gatherings, laughter around the table, and the joy of giving. With their delicate peppermint flavor, creamy texture, and beautiful red-and-white colors, these mints are perfect for gifting, holiday trays, or simply enjoying with a cup of hot cocoa by the fire.
Soft Christmas Peppermints are not only easy to make but also evoke nostalgia for childhood holidays, reminding us of cozy kitchens, holiday baking, and the excitement of festive treats. They are melt-in-your-mouth soft, subtly sweet, and beautifully festive, making them an ideal addition to any holiday celebration.
Ingredients and Their Role in Perfect Peppermints
Understanding the purpose of each ingredient ensures that your peppermint mints turn out soft, creamy, and full of flavor:
- ½ cup butter, softened – Provides a rich, creamy base and contributes to the melt-in-your-mouth texture.
- 3 cups powdered sugar – Sweetens the mints and helps the dough hold its shape. Powdered sugar also creates a smooth, velvety texture that’s easy to shape.
- 2 tablespoons heavy whipping cream – Softens the mixture and balances the sweetness, giving the mints a creamy, luxurious texture.
- ¼ teaspoon peppermint extract – Provides the classic peppermint flavor. Adjust to taste for a subtle or bold minty kick.
- Red gel food coloring – Creates festive red stripes when paired with white dough, adding visual appeal for holiday presentations.
Step-by-Step Instructions
Follow these steps to make soft, festive, and delicious Christmas peppermints:
Step 1: Beat the Butter
Place the softened butter in a mixing bowl. Using an electric mixer or a sturdy spoon, beat until the butter is light and fluffy. This step ensures your mints are airy and soft rather than dense.
Step 2: Add Sugar, Cream, and Peppermint Extract
Slowly mix in the powdered sugar, heavy cream, and peppermint extract. Beat until the dough becomes firm, smooth, and pliable. The mixture should hold together without sticking excessively to your hands.
Step 3: Divide and Color the Dough
Divide the dough into two portions. Leave approximately three-quarters of the dough white and color the remaining quarter with red gel food coloring. Knead the colored portion until the color is evenly distributed.
Step 4: Roll and Twist
Roll small portions of each dough color into thin ropes of equal thickness. Twist a white rope and a red rope together, forming a classic candy cane-like stripe pattern. Pinch off small sections to create individual mints.
Step 5: Dry and Set
Place the twisted mints on a parchment-lined tray and let them air dry for 1–2 hours. Afterward, cut them into bite-sized pieces if needed. Allow the mints to dry for a full 24 hours before serving to achieve the perfect melt-in-your-mouth texture.
Pro Tips for Perfect Soft Peppermints
- Ensure the butter is soft but not melted for the ideal consistency.
- Use gel food coloring instead of liquid for vibrant colors without altering dough texture.
- Adjust peppermint extract to your preference; start small and add more if needed.
- Keep mints in a cool, dry place to prevent them from sticking together.
- Twist ropes tightly but gently to preserve the pattern without squashing the mints.
Serving and Gift Ideas
- Arrange mints on a festive platter with other holiday candies for an attractive dessert tray.
- Package in small clear bags or jars with ribbons as charming homemade gifts.
- Serve alongside coffee, hot chocolate, or tea for a cozy holiday treat.
- Use mints to decorate gingerbread houses or holiday cakes for extra flair.
Frequently Asked Questions (FAQ)
Can I make these mints ahead of time?
Yes! You can make the mints up to 2 weeks in advance. Store them in an airtight container at room temperature to keep them soft and flavorful.
Can I use other colors besides red?
Absolutely! Green, pink, or any holiday-themed color works well. Just remember to use gel coloring to avoid altering the dough consistency.
How can I prevent the mints from sticking together?
Make sure the mints are fully dry before storing. Place layers of parchment paper between mints in your container for extra protection.
Can I substitute peppermint extract with another flavor?
Yes, vanilla extract or almond extract works as a subtle alternative, though the classic peppermint flavor is highly recommended for the holidays.
The History and Charm of Butter Mints
Butter mints have a storied history in American holiday baking. Originating in the late 19th century, these delicate confections were often served at family gatherings and holiday parties. The soft, creamy texture combined with the subtle sweetness made them a favorite among children and adults alike. Twisting colored doughs together became a festive way to celebrate holidays, adding visual charm to these already delightful treats.
Over time, butter mints evolved into a staple holiday confection, often gifted or displayed in candy dishes. The modern soft peppermint mints combine traditional flavors with vibrant colors, making them a timeless holiday treat that never goes out of style.
Conclusion
Soft Christmas Peppermints are more than just a sweet treat—they are a symbol of holiday tradition, family, and festive cheer. With a simple recipe, vibrant colors, and melt-in-your-mouth texture, they are perfect for decorating, gifting, or simply enjoying as a holiday indulgence. By following these steps, you can create beautiful, delicious mints that capture the spirit of the season and delight everyone around your table. Add a batch to your holiday plans this year and create sweet memories that will last a lifetime.