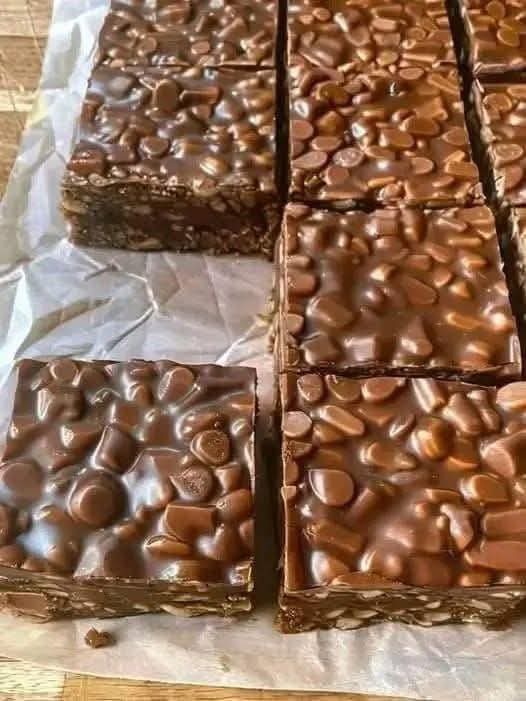
No-Bake Homemade Crunch Bars – Irresistible and Quick Treats
There’s something truly satisfying about creating a homemade dessert without turning on the oven. No-Bake Homemade Crunch Bars are the ultimate solution for anyone seeking a quick, delicious treat. With a perfect balance of chewy and crunchy textures, these bars are ideal for busy weeknights, a fun activity with kids, or when a craving for a sweet, nutty, and crunchy snack hits. Best of all, this recipe is highly versatile, allowing you to customize ingredients based on what’s in your pantry, ensuring a consistently delicious outcome every time.
Ingredients & Their Roles
- Crispy Rice Cereal (2 cups): Provides the iconic crunch and light texture essential to the bars.
- Rolled Oats (1 cup): Adds chewiness, fiber, and nutty flavor while balancing the sweetness.
- Chocolate Chips (1 cup): Introduces richness, sweetness, and a melt-in-your-mouth element.
- Optional Nuts (1/2 cup): Adds extra crunch, protein, and a flavor boost (pecans, walnuts, or almonds work well).
- Peanut Butter (1/2 cup): Acts as a binder while providing creaminess, nutty flavor, and protein.
- Honey (1/4 cup): Sweetens naturally and helps hold the bars together.
- Vanilla Extract (1 tsp): Enhances all flavors and adds aromatic depth.
- Salt (a pinch): Balances sweetness and enhances overall flavor.
Step-by-Step Instructions
Step 1: Prepare Your Pan
Line an 8×8-inch baking dish with parchment paper. Leave an overhang on two opposite sides; this will act as a sling for easy removal of the bars once they set. A clean lift ensures tidy cuts and avoids sticking.
Step 2: Make the Binding Mixture
In a small saucepan over low heat, gently warm peanut butter and honey, stirring constantly. This ensures a smooth, fluid mixture that will coat the dry ingredients evenly. The constant stirring prevents burning and creates a glossy, cohesive binder.
Step 3: Flavor Enhancement
Once the mixture is smooth and slightly warm, remove the pan from heat. Stir in vanilla extract and a pinch of salt. These small additions elevate the flavor profile, balancing sweetness and adding subtle aromatic notes that make each bite irresistible.
Step 4: Combine Dry Ingredients
In a large mixing bowl, combine crispy rice cereal, rolled oats, chocolate chips, and optional nuts. Mixing the ingredients thoroughly ensures even distribution of flavors and textures, guaranteeing every bar is perfectly balanced.
Step 5: Mix Wet and Dry Components
Pour the warm peanut butter and honey mixture over the dry ingredients. Stir thoroughly until all pieces are evenly coated. It’s essential that every bite is held together by the binding mixture; this ensures the bars don’t crumble and stay intact when cut.
Step 6: Transfer and Press
Transfer the mixture into the prepared pan. Using a spatula or clean hands, press the mixture down very firmly and evenly. Firm pressing is crucial for shaping the bars properly and preventing them from falling apart when sliced.
Step 7: Chill to Set
Place the pan in the refrigerator for at least 1–2 hours. Chilling allows the bars to firm up and the flavors to meld together. Patience here results in a bar that slices neatly and holds its texture perfectly.
Step 8: Slice and Serve
Once set, use the parchment overhang to lift the slab from the pan. Place on a cutting board and slice into bars or squares of your desired size. Serve immediately or store in an airtight container for up to a week. These bars are perfect for snacking, lunchboxes, or gifting.
No-Bake Homemade Crunch Bars – Tips, Variations, and Flavor Enhancements
Once you’ve mastered the basic recipe for No-Bake Homemade Crunch Bars, the fun truly begins. This versatile treat can be adapted in countless ways to suit your taste, dietary preferences, or even seasonal themes. Whether you want to experiment with flavors, textures, or nutritional boosts, these pro tips and variations will ensure every batch is as irresistible as the first.
Pro Tips for Perfect Crunch Bars
- Firm Pressing is Key: When transferring the mixture into the pan, press firmly with a spatula or your clean hands. Proper pressing ensures that the bars hold together when cut and don’t crumble during handling or storage.
- Chill Thoroughly: Refrigerating the bars for 1–2 hours is essential. This allows the binding mixture to solidify and meld with the dry ingredients, resulting in a chewy yet sturdy bar.
- Uniform Cutting: Use a sharp knife and cut with a gentle sawing motion. Wiping the blade between cuts prevents sticking and ensures neat, professional-looking bars.
- Quality Ingredients Matter: Opt for natural peanut butter without added sugar or oils. Choose high-quality chocolate chips and fresh oats to enhance flavor and texture.
- Mix-Ins: Feel free to incorporate dried fruits such as cranberries, raisins, or chopped apricots for a burst of sweetness and chewy contrast. Toasted coconut or puffed quinoa can also add interesting textures.
- Handling Chocolate: If you want the chocolate to melt slightly over the bars, sprinkle chips on top while the mixture is still warm. For fully set chips, wait until after chilling.
- Storage: Keep the bars in an airtight container at room temperature for up to 3 days, or refrigerate for up to a week. For longer storage, they freeze beautifully for up to a month.
Flavor Variations
One of the best parts of this recipe is its versatility. You can easily adapt it to different flavor profiles:
- Chocolate Lover’s Crunch: Add 1/2 cup cocoa powder to the dry mix or use chocolate-flavored cereal for a deeper chocolate experience.
- Nutty Delight: Mix in chopped almonds, cashews, or hazelnuts. Toast them lightly to intensify the flavor.
- Fruit & Nut Fusion: Add chopped dried fruits such as cherries, cranberries, or apricots, combined with nuts for a sweet and chewy contrast.
- Spiced Crunch: Add a pinch of cinnamon, nutmeg, or pumpkin spice to the peanut butter mixture for a warming flavor twist.
- White Chocolate & Berry: Substitute half of the chocolate chips with white chocolate and toss in freeze-dried berries for a colorful and tangy variation.
Serving Suggestions
These bars are incredibly versatile and can be served in many ways:
- Snack Packs: Perfect for lunchboxes, afternoon snacks, or a quick energy boost before workouts.
- Dessert Platters: Cut into small squares and arrange on a dessert tray alongside cookies and brownies for a party spread.
- Gift Ideas: Wrap individual bars in parchment paper or cellophane with a ribbon for a thoughtful homemade gift.
- Breakfast Option: Pair a bar with a cup of coffee or a smoothie for a quick, satisfying breakfast on busy mornings.
- Party-Friendly: Serve chilled at potlucks or holiday gatherings—they’re always a hit and disappear fast.
Additional Tips for Success
- Custom Shapes: Don’t limit yourself to squares—use cookie cutters for festive shapes during holidays.
- Double Batch: Easily double the recipe and use a 9×13-inch pan. Just make sure to press the mixture firmly to maintain thickness.
- Experiment with Flavors: Mix peanut butter with almond butter, cashew butter, or sunflower butter for different nutty profiles.
- Enhance Sweetness: Drizzle melted chocolate or a thin layer of caramel over the top before chilling for a decadent twist.
- Balance Sweet & Salty: Sprinkle a tiny pinch of coarse sea salt over the top for a gourmet touch that accentuates the flavors.
By following these pro tips and exploring these variations, your No-Bake Homemade Crunch Bars will always be a crowd-pleasing, perfectly balanced treat that combines sweetness, crunch, and richness in every bite.
No-Bake Homemade Crunch Bars – Troubleshooting, Advanced Mix-Ins, and Storage Tips
Even with a simple recipe like No-Bake Homemade Crunch Bars, small adjustments can make a big difference in texture, flavor, and appearance. Batch 3 focuses on solving common issues, incorporating creative mix-ins, and ensuring perfect storage and presentation. By mastering these aspects, you can confidently make bars that are consistently delicious and visually appealing.
Troubleshooting Common Issues
Here are some potential challenges and their solutions:
- Bars Too Sticky: If your bars stick to your hands or knife, it usually means the mixture needs a little more chilling. Refrigerate for an additional 30 minutes to firm up before cutting.
- Bars Crumble When Cut: Ensure you press the mixture firmly into the pan. If the bars are still crumbly, try adding an extra tablespoon of peanut butter or honey to act as a stronger binder.
- Dry or Hard Bars: Using too much dry cereal or oats can make bars dry. Always measure accurately and adjust with a teaspoon of liquid (milk, water, or more honey) if needed.
- Chocolate Chips Melt Too Much: If chocolate melts too much during assembly, wait until the mixture cools slightly before adding chips, or sprinkle them on top just before chilling.
- Mixture Not Holding Together: Double-check that peanut butter and honey are warm and thoroughly combined before adding to dry ingredients. This ensures even coating and binding.
Advanced Mix-Ins for Maximum Flavor
Take your bars to the next level with these creative mix-ins:
- Protein Boost: Add protein powder to the dry mix for an energy-packed snack. Vanilla or chocolate protein powders work best.
- Seeds & Superfoods: Chia seeds, flax seeds, or hemp hearts can enhance nutrition and add subtle crunch.
- Flavorful Extracts: In addition to vanilla, try almond extract, coconut extract, or even a hint of peppermint extract for seasonal variations.
- Cereal Swaps: Use puffed quinoa, rice crisps, or even crushed cornflakes for a different texture.
- Nut Butter Variations: Almond, cashew, or sunflower butter can replace peanut butter for different flavors or to accommodate allergies.
- Chocolate Drizzle: Melt dark or white chocolate and drizzle over the set bars for a gourmet look and extra indulgence.
- Layered Bars: Create a two-layer version by separating half the mixture, pressing it down, then adding a chocolate or caramel layer before pressing the rest of the mixture on top.
Perfect Storage & Serving Tips
Proper storage is crucial to maintain freshness, texture, and taste:
- Refrigeration: Store bars in an airtight container in the fridge for up to a week. This keeps them firm and prevents them from becoming overly sticky in warmer temperatures.
- Freezing: Wrap bars individually in parchment paper or plastic wrap and place in a freezer-safe container. They can last up to one month and thaw quickly at room temperature before serving.
- Room Temperature: In cooler climates or air-conditioned kitchens, bars can be stored at room temperature for up to 3 days in an airtight container.
- Presentation: For gifting or serving, cut bars into uniform squares or rectangles. Use a sharp knife and wipe between cuts for clean edges. Arrange them on a platter or in parchment-lined boxes.
- On-the-Go Packing: Individually wrap bars in parchment paper for snacks, lunchboxes, or travel. This prevents sticking and ensures freshness.
Serving Suggestions
No-Bake Homemade Crunch Bars are versatile in how you serve them. Here are a few ideas:
- Pair with coffee or tea for a mid-morning snack.
- Serve as an afternoon pick-me-up with milk or hot chocolate.
- Include them in party dessert trays alongside cookies, brownies, or other bars.
- Use as a quick energy boost before workouts or outdoor activities.
- Enhance presentation with a light dusting of powdered sugar, drizzle of chocolate, or crushed nuts on top.
With these troubleshooting tips, creative mix-ins, and storage guidelines, your No-Bake Homemade Crunch Bars will always turn out perfectly. The bars will remain chewy, crunchy, and flavorful, no matter the variation you choose or how often you make them. Whether for family, friends, or special occasions, these bars are guaranteed to impress.
No-Bake Homemade Crunch Bars – Nutritional Info, Presentation & Persuasive Conclusion
Batch 4 of our No-Bake Homemade Crunch Bars dives into nutritional considerations, serving presentation ideas, and concludes with a compelling argument for why this recipe should be your go-to treat. These bars are more than just a snack—they’re a versatile, customizable, and irresistibly delicious solution for cravings, parties, and energy boosts. By understanding their nutritional benefits and optimizing presentation, you can enjoy a treat that is both indulgent and mindful.
Nutritional Information
While these bars are a treat, understanding their nutritional content can help you enjoy them mindfully. The ingredients contribute the following:
- Peanut Butter: Provides healthy fats, protein, and a rich, creamy flavor. Helps bind the bars while adding satiety.
- Honey: Natural sweetener that adds chewiness and moisture while delivering trace antioxidants.
- Crispy Rice Cereal & Rolled Oats: Offer texture and a slight fiber boost. Oats also contribute to longer-lasting energy.
- Chocolate Chips: Provide sweetness and indulgence; dark chocolate chips can add antioxidants and depth of flavor.
- Nuts (Optional): Almonds, walnuts, or pecans add protein, healthy fats, and crunch, enhancing both nutrition and texture.
- Vanilla Extract & Salt: Small quantities enhance overall flavor and balance sweetness.
Approximate nutrition per bar (assuming 12 bars per batch, with optional nuts): 250–300 calories, 10–12g fat, 30–35g carbohydrates, 4–5g protein, and 2–3g fiber. Using natural peanut butter and dark chocolate can improve nutritional quality further.
Final Presentation Tips
Presentation elevates a simple bar into a visually stunning treat. Consider these tips:
- Uniform Cutting: Use a sharp knife and parchment “sling” to lift the entire slab from the pan. Cut with clean, deliberate strokes to create even bars.
- Drizzle for Visual Appeal: Melt chocolate or caramel and drizzle on top in thin, even lines for a professional look.
- Sprinkle Toppings: Toasted coconut, crushed nuts, or sea salt flakes on top add texture, color, and flavor contrast.
- Layered Appearance: For multi-layer bars, carefully press each layer to maintain structure, allowing flavors to shine through visually.
- Serve on Decorative Platters: Use colorful or rustic trays, lined with parchment or wax paper, to make them gift-worthy or perfect for parties.
- Label and Portion: Individual wrapping or portioning ensures freshness, reduces stickiness, and makes serving easy at gatherings or for lunchboxes.
Why This Recipe Is Loved
People adore these bars because:
- Quick & No-Bake: Minimal effort with maximum results—perfect for busy lifestyles or last-minute desserts.
- Customizable: Swap nuts, cereal, or chocolate to match preferences, dietary needs, or seasonal flavors.
- Kid-Friendly: Children enjoy helping mix, press, and shape, turning the recipe into a fun, interactive activity.
- Perfect Texture: Chewy, crunchy, and slightly sweet, satisfying multiple cravings simultaneously.
- Versatile Use: Ideal as snacks, lunchbox additions, dessert bars, or energy bites for outdoor activities.
Pro Tips for Maximum Enjoyment
- Press mixture firmly into the pan for bars that hold their shape perfectly.
- Refrigerate at least 2 hours for optimal firmness and easy slicing.
- Experiment with mix-ins gradually; adding too much can compromise the binding.
- Use parchment paper overhang (“sling”) to lift bars cleanly from the pan for neat edges.
- Store in an airtight container in the refrigerator for 5–7 days or freeze for up to a month.
Persuasive Conclusion
The No-Bake Homemade Crunch Bars are the ultimate combination of simplicity, flavor, and versatility. They prove that you don’t need complicated techniques, long baking times, or fancy ingredients to create a dessert that’s both indulgent and crowd-pleasing. With chewy texture, satisfying crunch, and limitless customization possibilities, these bars are perfect for any occasion—from a busy weeknight snack to a gift-worthy treat. By following these detailed instructions, troubleshooting tips, and presentation advice, you will consistently produce bars that are both delicious and visually stunning. Make these bars today and elevate your snack game to a level that friends, family, and even yourself will rave about.