5 Minute Fudge — The Quick Chocolate Treat That Feels Like Home
Imagine the comforting aroma of chocolate melting slowly on the stove, filling the kitchen with warmth and nostalgia.
This 5 Minute Fudge recipe is not just a dessert — it’s an experience. It’s the kind of fudge that brings back memories of cozy afternoons, shared smiles, and sweet moments that linger in your heart.
Perfect for when you crave something indulgent but don’t have hours to spend baking, this fudge blends simplicity with luxurious flavor.
Each batch is creamy, chocolatey, and melts in your mouth, evoking that feeling of a homemade treat made with love — just like the fudge your mama used to make.
This recipe is ideal for beginners and seasoned bakers alike. Even if you’ve never made candy before, following these steps ensures a flawless result every time.
Plus, with optional nuts or flavor variations, you can personalize your fudge to delight your taste buds and impress anyone lucky enough to try it.
Ingredients for 5 Minute Fudge
Each ingredient is chosen carefully for its role in creating the perfect texture and flavor:
| Ingredient | Quantity | Role in Recipe |
|---|---|---|
| Milk chocolate chips | 6 ounces | Provides the main chocolate flavor and creamy texture that defines the fudge. |
| Large marshmallows | 16 | Adds a soft, chewy texture and additional sweetness, helping the fudge set properly. |
| Granulated sugar | 1 2/3 cups | Sweetens the fudge and ensures the proper consistency as it cools. |
| Condensed milk | 2/3 cup | Creates a rich, creamy base and binds all ingredients together seamlessly. |
| Unsalted butter | 1 tablespoon | Enhances richness and smooth mouthfeel, making the fudge luxurious. |
| Salt | 1/2 teaspoon | Balances sweetness and intensifies chocolate flavor, adding depth to the fudge. |
| Vanilla extract | 1 teaspoon | Brings warmth and a gentle aroma that complements the chocolate perfectly. |
| Chopped nuts (optional) | 1 cup | Adds texture, crunch, and a nutty contrast to the creamy fudge. |
Before starting, gather all your ingredients and tools. You’ll only need a medium saucepan, a sturdy wooden spoon or silicone spatula, and a heatproof pan for setting the fudge.
This preparation ensures a smooth, stress-free process that even beginners can master.
Every ingredient in this recipe has a purpose, from the rich chocolate to the subtle hint of salt, ensuring that each bite of fudge is perfectly balanced and irresistibly smooth.
Step-by-Step Instructions for Perfect 5 Minute Fudge
Making this fudge may only take five minutes of active cooking, but each step is essential for a smooth, creamy result.
Take your time to follow these detailed instructions and you’ll achieve a chocolate treat that’s soft, rich, and utterly irresistible.
-
1. Combine the Sugar, Condensed Milk, Butter, and Salt
Place a medium, heavy-bottomed saucepan on your stove. Add the granulated sugar, condensed milk, unsalted butter, and salt.
Stir gently with a wooden spoon or heatproof silicone spatula until the mixture is smooth and well combined.Pro Tip: Using a heavy-bottomed pan helps prevent hot spots that can burn the sugar. Slow, consistent stirring is key.
-
2. Bring the Mixture to a Gentle Boil
Turn the heat to medium. Stir the mixture constantly as it heats. Once it begins to boil, start timing it for exactly 5 minutes.
Stir continuously to prevent crystallization and ensure an even, smooth texture.Pro Tip: Keep your eyes on the pan — the moment it starts bubbling, reduce the heat slightly if necessary to maintain a gentle boil. Vigorous boiling can cause uneven cooking or scorching.
-
3. Add the Chocolate Chips
Remove the saucepan from the heat immediately after the 5 minutes are up. Add milk chocolate chips to the hot mixture.
Stir gently but thoroughly until the chocolate is completely melted and the mixture becomes glossy and smooth. This forms the core creamy texture of your fudge.Pro Tip: If your chocolate chips are not melting evenly, place the pan over very low heat for a few seconds while stirring — but avoid boiling again.
-
4. Incorporate Marshmallows and Vanilla Extract
Add the large marshmallows and vanilla extract to the hot chocolate mixture.
Stir consistently until the marshmallows are fully melted, resulting in a soft, luscious texture.Pro Tip: Marshmallows melt faster if you tear them into smaller pieces before adding. This ensures a completely uniform fudge.
-
5. Fold in Nuts (Optional)
If you enjoy a bit of crunch, gently fold in chopped nuts at this stage.
Pecans or walnuts add contrast to the smoothness and enhance the flavor depth.Pro Tip: Toast the nuts lightly in a dry pan before adding for a richer, nutty aroma.
-
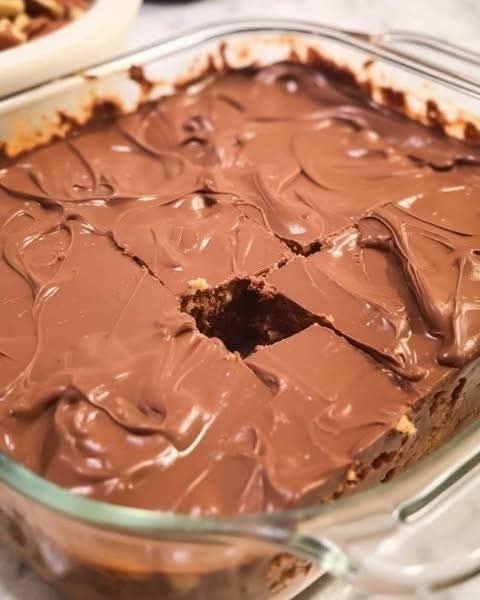
6. Pour the Fudge into a Pan
Line an 8×8-inch heatproof pan with parchment paper or lightly grease it with butter.
Pour the fudge mixture in and spread it evenly using a spatula. Smooth the top to ensure an even surface.Pro Tip: For a decorative touch, create swirls on top using a knife or spoon, especially if you’re adding peanut butter or caramel swirls.
-
7. Let the Fudge Set
Allow the fudge to cool at room temperature for about 2 hours. If you’re short on time, refrigerate for 45 minutes.
The fudge should be firm enough to cut but soft and creamy inside.Pro Tip: Avoid covering the pan tightly while it’s warm to prevent condensation forming on top, which can make the fudge sticky.
-
8. Slice and Serve
Use a sharp knife to cut the fudge into squares. For clean, precise slices, dip your knife in hot water and wipe it dry between cuts.
Serve on a pretty plate, enjoy immediately, or package for gifting.Pro Tip: The fudge can be stored in an airtight container at room temperature for up to a week. For longer storage, refrigerate or freeze.
Following these steps carefully guarantees a fudge that is smooth, decadent, and truly melts in your mouth.
Each step, though simple, ensures the perfect balance of texture, sweetness, and chocolate flavor.
Pro Tips, Flavor Variations & Serving Ideas
While the basic recipe is already delicious, these professional tips and creative variations can elevate your 5 Minute Fudge to the next level.
Whether you want to impress guests, customize for your taste, or create gifts, these insights make every batch special.
1. Stirring and Texture Tips
- Stir constantly during the boil to prevent sugar crystals — this ensures your fudge remains smooth and creamy.
- Use a silicone spatula or a wooden spoon for best results — they distribute heat evenly and allow better control.
- If the fudge looks slightly grainy, don’t worry. A quick whisk after adding chocolate can help smooth it out.
2. Chocolate Selection
- High-quality milk chocolate or semi-sweet chocolate chips give a richer flavor. Avoid low-quality chips with fillers for best results.
- For an intense chocolate taste, try combining dark chocolate and milk chocolate chips in equal parts.
- White chocolate can be used for a creamy variation — swirl it on top for a decorative touch.
3. Flavor Variations
Experiment with these creative ideas to make your fudge unique:
- Peanut Butter Swirl: Add dollops of peanut butter to the hot fudge and swirl gently with a knife.
- Mint Chocolate: Replace vanilla extract with ½ teaspoon peppermint extract for a refreshing twist.
- Espresso Fudge: Dissolve 1 teaspoon of instant coffee in the condensed milk before cooking to add a mocha flavor.
- Nut-Free Version: Skip nuts for a smooth, velvety texture that’s perfect for kids.
- Festive Touch: Sprinkle colored candy pieces, mini chocolate chips, or crushed cookies on top before setting.
4. Serving Suggestions
- Cut into small squares for a classic presentation.
- Use a cookie cutter for fun shapes for parties or gifts.
- Pair with coffee or milk for a perfect afternoon treat.
- Arrange on decorative plates or gift boxes with parchment for a homemade gift that feels luxurious.
5. Storage Tips
- Store fudge in an airtight container at room temperature for up to 5 days.
- For longer storage, refrigerate for up to 2 weeks. Bring to room temperature before serving for best texture.
- Fudge freezes beautifully. Wrap tightly in parchment paper and foil; freeze for up to 3 months. Thaw in the fridge or at room temperature.
- Avoid covering fudge while it’s still warm to prevent condensation from making the surface sticky.
6. Gifting Ideas
Homemade fudge makes a thoughtful and cherished gift.
Line a small decorative box with parchment paper, arrange the fudge neatly, and add a ribbon.
Include a small handwritten note describing the flavor or a personal memory associated with the fudge — it becomes more than a dessert, it becomes a heartfelt gift.
By using these tips and variations, each batch of 5 Minute Fudge can be customized, refined, and presented beautifully.
From creative flavors to perfect presentation and storage, you now have all the tools to make fudge like a professional chef — quickly, easily, and delightfully.
Final Thoughts — Indulge in Homemade Bliss
There’s something uniquely comforting about creating a dessert that’s not only delicious but also quick and effortless.
This 5 Minute Fudge proves that indulgence doesn’t need hours in the kitchen or complicated techniques.
With just a few simple ingredients, a wooden spoon, and five minutes of your time, you can transform your kitchen into a chocolate lover’s paradise.
Each bite delivers a harmonious blend of sweetness, creaminess, and subtle chocolate warmth.
It’s a dessert that feels luxurious yet is completely accessible — perfect for spontaneous cravings, family gatherings, or thoughtful homemade gifts.
Remember, the beauty of this recipe lies not only in its taste but also in its versatility.
Experiment with swirls of peanut butter, hints of peppermint, espresso infusions, or a sprinkle of your favorite nuts.
Every variation can become a signature creation that reflects your personality and creativity in the kitchen.
Sharing fudge made from scratch carries a personal touch that store-bought treats simply cannot match.
Imagine gifting these little squares of chocolate bliss to friends, neighbors, or loved ones — each piece wrapped in parchment, tied with a ribbon, and filled with thoughtfulness.
You’re not just giving dessert; you’re giving a moment of joy, a sweet memory, a homemade hug.
Why You’ll Keep Coming Back to This Recipe:
- It’s incredibly quick — perfect for busy days or sudden chocolate cravings.
- The texture is soft, creamy, and melts in your mouth.
- Fully customizable — add flavors, textures, or decorations to your heart’s desire.
- Easy to store and perfect for gifting — practical without compromising luxury.
- Foolproof — even first-time candy makers can achieve excellent results.
So gather your ingredients, embrace the process, and treat yourself to the sweet satisfaction of homemade fudge.
Five minutes is all it takes to create a chocolate masterpiece that will bring smiles, indulgence, and a touch of nostalgia to every bite.
Try it today, and discover why this 5 Minute Fudge will become a beloved classic in your kitchen for years to come.