Avalanche Cookies – No Bake & Only 4 Ingredients
Introduction
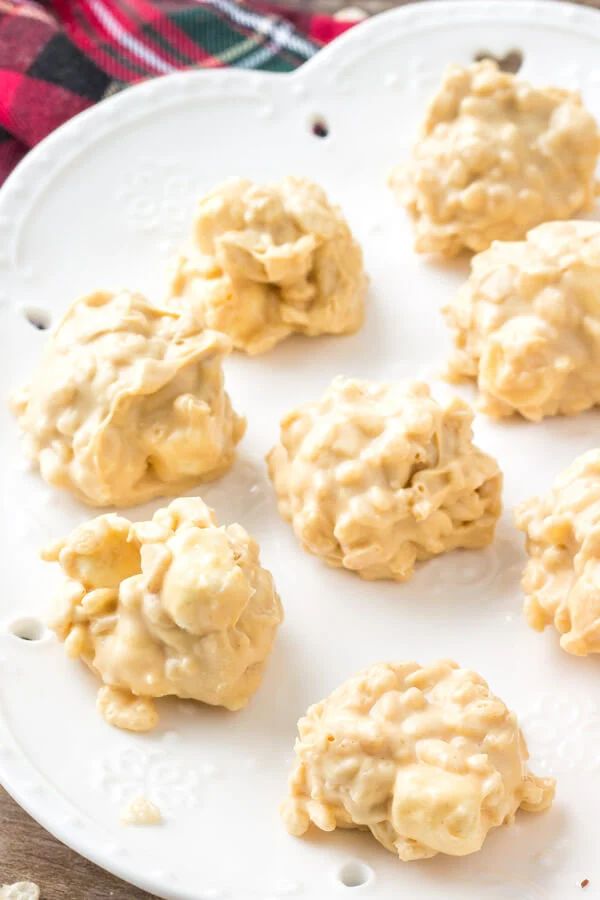
If you’re craving a sweet, crunchy, and irresistibly creamy treat that’s ready in minutes, these Avalanche Cookies are exactly what you need. Perfect for last-minute snacks, holiday desserts, or a simple homemade gift, these cookies deliver big flavor with minimal effort. Unlike traditional baked cookies, this recipe is no-bake, meaning you don’t have to heat up your oven, wait for dough to chill, or worry about overbaking. Instead, you get a delightful combination of crisp cereal, gooey marshmallows, rich white chocolate, and creamy peanut butter that melts in your mouth with every bite.
What makes Avalanche Cookies so special is how each of the four ingredients plays a crucial role. Despite the simplicity, the balance of flavors and textures creates a treat that feels indulgent and luxurious, yet easy enough to whip up in under 20 minutes. Whether you’re a busy parent, a college student, or just someone who loves quick desserts, these cookies hit all the marks: sweet, creamy, crunchy, and fun.
Ingredients & Their Roles
- 2 cups crispy rice cereal: Provides the signature crunch and light texture of the cookies. The cereal holds the cookie together while balancing the sweetness of the white chocolate and peanut butter.
- 1/2 cup mini marshmallows: Adds a soft, chewy element that blends beautifully with the other ingredients. Marshmallows help bind the cereal and chocolate together, giving the cookies their “avalanche” effect.
- 1 lb white chocolate chips: The creamy, sweet backbone of the recipe. White chocolate coats the cereal and marshmallows, bringing richness and smoothness that melts on the tongue.
- 1/2 cup peanut butter: Adds depth, a slight saltiness, and a complementary nutty flavor. Peanut butter enhances the white chocolate, balancing sweetness while helping bind the mixture for easy shaping.
Why You’ll Love This Recipe
These cookies are beloved for their simplicity and flavor harmony. They’re perfect for kids’ parties, cookie exchanges, or any occasion where you need a sweet, no-fuss dessert. Unlike traditional cookies that require precise baking times or chilling, these Avalanche Cookies are forgiving. The ingredients are pantry staples, so you can whip them up anytime. Plus, customizing is easy—add sprinkles, chocolate chips, or chopped nuts for festive flair.
Step 1: Preparing Your Workspace
Start by lining two cookie sheets with wax paper or parchment. This step ensures your cookies don’t stick and makes cleanup effortless. Keep a large mixing bowl nearby for combining the cereal and marshmallows, and have a heatproof bowl ready for melting the chocolate and peanut butter. Organizing your ingredients before heating helps the process flow smoothly, especially when working with melted chocolate, which can seize if it cools too quickly.
Step 2: Mixing the Dry Ingredients
In your large mixing bowl, combine the 2 cups of crispy rice cereal with 1/2 cup mini marshmallows. Stir gently to distribute the marshmallows evenly throughout the cereal. This ensures that every bite has a balance of chewy and crunchy textures. Setting this aside while you melt the chocolate and peanut butter saves time and prevents the marshmallows from sticking together prematurely.
Step 3: Melting the Chocolate and Peanut Butter
Next, it’s time to create the creamy, luscious coating that makes these cookies irresistible. In a large heatproof bowl, combine 1 lb of white chocolate chips with 1/2 cup of peanut butter. The combination of white chocolate and peanut butter is key: the chocolate adds sweetness and smooth texture, while the peanut butter introduces a nutty, slightly salty flavor that balances the richness perfectly.
To melt the mixture, you can use a microwave or a double boiler. If using a microwave, heat in 30-second intervals on medium power. After each interval, stir thoroughly to ensure even melting and to prevent the chocolate from burning. Repeat this process until the chocolate is almost fully melted, then remove and continue stirring until smooth. Tip: Avoid high heat—white chocolate is sensitive and can seize easily if overheated.
Using a double boiler works equally well and offers more control. Fill a saucepan with 1–2 inches of water and bring to a gentle simmer. Place the heatproof bowl over the simmering water, ensuring it doesn’t touch the water. Stir frequently until the chocolate and peanut butter have melted into a smooth, glossy mixture.
Step 4: Combining Chocolate with Cereal Mixture
Once your chocolate and peanut butter are melted, slowly pour the mixture over the cereal and marshmallow bowl. Use a spatula to fold gently but thoroughly, ensuring each piece of cereal is coated. Take your time—coating every piece evenly guarantees that every bite of your Avalanche Cookies will have the perfect blend of crunch, chewiness, and creamy sweetness.
Be careful not to overmix. The marshmallows will stretch slightly, creating soft pockets within the clusters. This contrast between the chewy marshmallow, crunchy cereal, and creamy chocolate is what gives these cookies their signature texture and the “avalanche” effect that inspired their name.
Step 5: Shaping the Clusters
With the mixture fully coated, it’s time to form your cookies. Use a tablespoon or small cookie scoop to drop portions onto the prepared cookie sheets lined with wax paper or parchment. Aim for uniform size so the cookies bake or set evenly and look visually appealing when served. If you want slightly larger or smaller cookies, adjust accordingly—but be consistent for even presentation.
Pro Tip: Wetting your hands lightly with water before shaping helps prevent the sticky chocolate from clinging to your fingers. Alternatively, you can use two spoons to shape each mound neatly. Once shaped, gently press the tops of the clusters with the back of a spoon to flatten slightly for a more finished appearance.
Step 6: Adding Optional Enhancements
At this stage, you can get creative. Sprinkle mini chocolate chips, crushed candy canes, or a pinch of sea salt over the top of each cookie for added flavor and a festive touch. These small touches not only enhance taste but also elevate the cookies’ visual appeal, making them perfect for holiday platters or gift packaging.
Once all clusters are formed, allow them to set. Place the cookie sheets in a cool area or in the refrigerator for 30–45 minutes, until the chocolate is firm. Avoid moving the cookies too soon, as this may cause the clusters to lose their shape.
Step 7: Cooling the Avalanche Cookies
After forming your Avalanche Cookies, cooling is an essential step to ensure the clusters set properly. Place the cookie sheets in a cool, dry area or in the refrigerator. Allow at least 30–45 minutes for the chocolate and peanut butter coating to firm up completely. This step is crucial for maintaining the shape and texture of the cookies. If they are not fully set, they may flatten or stick together when moved.
Tip for faster setting: If you’re in a hurry, you can place the cookie sheets in the refrigerator. The cool temperature will help the chocolate firm up more quickly, but avoid the freezer as rapid cooling may cause the chocolate to bloom, creating a whitish appearance on the surface. Bloom doesn’t affect taste but can affect visual appeal.
Step 8: Storing Your Cookies
Proper storage is essential to preserve the crunch, chewiness, and creaminess of your Avalanche Cookies. Once cooled and set, transfer the clusters into an airtight container. Layer the cookies with wax paper or parchment between layers to prevent sticking. These cookies can be stored at room temperature for up to 5 days, making them a great make-ahead treat for parties or holiday gifting.
For longer storage, you can refrigerate them for up to two weeks. Make sure the container is sealed tightly to prevent moisture from softening the chocolate. If you prefer, you can even freeze the cookies for up to 2 months. Wrap them individually in plastic wrap and place in a freezer-safe bag. Thaw at room temperature before serving for best results.
Step 9: Serving Suggestions
Avalanche Cookies are extremely versatile and perfect for various occasions. Serve them on a festive holiday platter alongside other no-bake treats, or package them in decorative tins or cellophane bags as gifts. These cookies pair wonderfully with a glass of cold milk, hot chocolate, or even a cup of coffee. Their combination of creamy white chocolate, nutty peanut butter, and chewy marshmallow makes them irresistible for both kids and adults.
Creative serving ideas: drizzle additional melted chocolate over the cooled clusters, or sprinkle crushed candy canes on top for a festive twist. You can also add mini chocolate chips, toasted coconut, or even small sprinkles to customize the flavor and appearance.
Step 10: Troubleshooting Common Issues
Even simple recipes like Avalanche Cookies can encounter minor hiccups. Here’s how to solve common problems:
- Chocolate too thick: If your melted chocolate seems lumpy, stir in a small teaspoon of shortening or coconut oil to achieve smooth consistency.
- Sticky clusters: Ensure the cookies are cooled completely. Refrigeration can help firm up sticky clusters.
- Clusters falling apart: Fold the chocolate thoroughly but gently, ensuring each cereal piece is coated evenly. Overmixing may break the marshmallows and reduce binding.
- Chocolate bloom: Rapid cooling in the freezer may cause a whitish surface. This is purely cosmetic and does not affect taste.
Step 11: Why This Recipe is Loved
These no-bake cookies are loved for their simplicity, speed, and irresistible texture. The combination of crunchy rice cereal, soft marshmallows, creamy white chocolate, and nutty peanut butter creates a multidimensional bite that is hard to resist. Perfect for holidays, parties, or last-minute treats, they are a hit with all ages.
Step 12: Advanced Tips for Perfect Avalanche Cookies
Once you’ve mastered the basic recipe, there are a few advanced tips to elevate your Avalanche Cookies from simple treats to show-stopping desserts. First, always use high-quality white chocolate chips for the best flavor and smoothest texture. Avoid low-quality or flavored wafers, which may not melt as evenly and can affect taste. Similarly, select fresh peanut butter without excess oil separation, as this ensures better consistency and binding in your clusters.
Another professional tip is to slightly toast the rice cereal and mini marshmallows before folding them into the chocolate mixture. This brings out a subtle nutty aroma and enhances flavor depth. For a festive touch, you can fold in crushed peppermint candies, mini M&Ms, or even tiny sprinkles to match the holiday theme. Additionally, if you want extra crunch, lightly toast some chopped nuts such as pecans or almonds and fold them into the clusters before setting.
Step 13: Recipe Variations
The versatility of Avalanche Cookies allows for endless variations. Consider the following twists to customize your treats:
- Chocolate Variation: Substitute white chocolate with milk or dark chocolate for a richer, more decadent flavor. Swirl in a mix of dark and white chocolate for a marbled effect.
- Nut-Free Version: Replace peanut butter with sunflower seed butter or cookie butter for allergy-friendly clusters without compromising taste.
- Seasonal Add-Ins: Add dried cranberries, chopped dried apricots, or tiny chocolate chips to create a personalized flavor profile. This makes the cookies ideal for themed parties or holiday gifts.
- Mini Cluster Bites: Roll the mixture into smaller bite-sized portions for individual servings. These are perfect for lunchboxes, snack plates, or party platters.
- Drizzle Presentation: Once the clusters are set, drizzle melted chocolate over the top in decorative patterns. Use contrasting chocolate colors to create a visually stunning treat.
Step 14: Serving and Presentation Ideas
Serving Avalanche Cookies is as fun as making them. Place them on a festive platter for parties, in clear cellophane bags tied with a ribbon for gifts, or stack them in mason jars for a charming display. These cookies pair beautifully with milk, coffee, hot cocoa, or tea, making them versatile for dessert tables, snack times, or after-dinner indulgences.
For a professional touch, garnish the platter with edible glitter, crushed peppermint, or nuts to elevate the presentation. You can also create themed clusters by using colored sprinkles to match holidays such as Christmas, Halloween, or birthdays.
Step 15: Persuasive Conclusion
Avalanche Cookies are a no-bake, easy-to-make treat that combines creamy, chewy, and crunchy textures in every bite. From the simplicity of melting chocolate and peanut butter to the playful mix of rice cereal and marshmallows, this recipe is approachable for both beginner and seasoned bakers. By following these steps, you can create a festive, indulgent, and crowd-pleasing treat that’s perfect for holidays, parties, gifts, or casual snacking.
With options for customization, advanced techniques, and creative presentation, Avalanche Cookies offer endless possibilities for flavor and style. They’re not just cookies—they’re a conversation starter, a nostalgic indulgence, and a symbol of homemade care. Make a batch today and experience the joy of serving irresistible, melt-in-your-mouth cookies that everyone will love.
Pro Tip: Always store your clusters in airtight containers and enjoy within 5–7 days for maximum freshness. Share them with friends and family, and watch them disappear faster than you can say “Avalanche Cookies!”