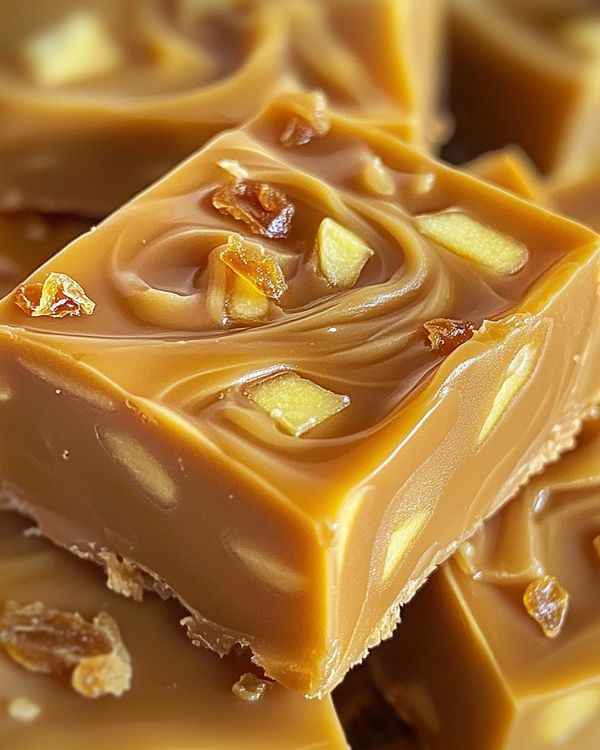
Peanut Butter Christmas Fudge
There’s something magical about holiday treats, and nothing screams festive more than creamy, nutty, and colorful Peanut Butter Christmas Fudge. This no-bake candy combines the rich, savory sweetness of peanut butter with the smooth creaminess of white chocolate to create a melt-in-your-mouth delight. Perfect for gifting, decorating dessert tables, or just indulging in cozy winter nights, this fudge has become a seasonal favorite for families everywhere. What makes it irresistible is its perfect balance between sweetness and the subtle nutty depth, coupled with the playful addition of sprinkles that evoke holiday cheer.
In this first batch, we’ll dive into the ingredients and the fundamental role each plays in crafting this perfect holiday fudge. Understanding each component ensures flawless results every time.
Ingredients & Their Roles – Part 1
- 1 cup creamy peanut butter: This is the heart of the fudge, giving a rich, nutty flavor and smooth texture. The creamy consistency ensures the fudge is soft but holds its shape.
- 1/4 cup unsalted butter: Adds a velvety richness and enhances the smoothness of the peanut butter. Butter also helps achieve the right consistency, allowing the fudge to set without becoming hard.
- 2 cups white chocolate chips: These contribute sweetness and creaminess while providing structural integrity. They meld with the peanut butter to form a cohesive, luscious batter that is easy to pour and shape.
- 1 teaspoon vanilla extract: Adds aromatic depth and enhances the nutty sweetness of the peanut butter while balancing the richness of the chocolate.
At this stage, it is crucial to choose high-quality ingredients. Using creamy peanut butter without oil separation ensures a consistent texture, while premium white chocolate chips yield a smoother melt and richer taste. Vanilla extract should ideally be pure, as artificial flavoring can compromise the natural harmony of the fudge.
Batch 1 sets the foundation for your Peanut Butter Christmas Fudge. By focusing on ingredient selection and understanding their roles, you establish a perfect base that will elevate the final product. The combination of peanut butter, butter, and white chocolate forms the creamy matrix that holds everything together and ensures the fudge will be indulgent and irresistible.
Ingredients & Their Roles – Part 2
- 1 (14 oz) sweetened condensed milk: This provides sweetness and moisture, acting as a binder that holds the peanut butter and chocolate together. It also contributes to the fudge’s creamy consistency without needing additional sugar.
- 1/2 teaspoon salt: A pinch of salt enhances the natural flavor of peanut butter and white chocolate. It balances sweetness and prevents the fudge from tasting flat or overly sugary.
- Colorful holiday sprinkles (optional, about 1/2 cup): Sprinkles add festive visual appeal and texture. While not essential for flavor, they make the fudge visually irresistible, perfect for gifting and holiday tables.
Now that the ingredients are ready, it’s time to prepare your workspace. Line an 8×8 or 9×9 baking pan with parchment paper, leaving an overhang on the sides to make removing the fudge easier after it sets. Gather all ingredients and tools in one place: a medium saucepan, heatproof bowl, spatula, and whisk. Ensuring everything is at hand before starting reduces stress and prevents mistakes.
Step-by-Step Preparation – Stage 1
- Melt Butter and White Chocolate: In a heatproof bowl over a saucepan of simmering water (or using a microwave in 20-second bursts), melt the white chocolate with the butter. Stir constantly until smooth, ensuring no chocolate burns or seizes. This creates a creamy base for the fudge and allows the peanut butter to blend seamlessly.
- Add Peanut Butter: Once the chocolate and butter are melted, lower the heat slightly and whisk in the peanut butter. Blend until completely smooth. This step integrates the nutty flavor evenly and ensures a uniform texture in every bite.
- Incorporate Sweetened Condensed Milk: Gradually stir in the sweetened condensed milk. Mixing slowly prevents lumps and allows the ingredients to emulsify into a thick, luscious batter.
- Add Vanilla and Salt: Stir in vanilla extract and a pinch of salt. These small touches enhance depth of flavor and elevate the overall taste profile of your fudge.
At this stage, the mixture should be thick, creamy, and glossy. Avoid overheating, as this can cause the mixture to separate or lose its creamy texture. Gentle, patient stirring ensures the final fudge is perfectly smooth and indulgent.
Step-by-Step Preparation – Stage 2
- Prepare the Pan: Make sure your 8×8 or 9×9 pan is lined with parchment paper with an overhang. Lightly grease the parchment with a small amount of butter or non-stick spray to prevent sticking.
- Pour the Fudge: Carefully pour the peanut butter fudge mixture into the prepared pan. Use a spatula to scrape the sides of the bowl and spread the mixture evenly. Smooth the top so that the fudge is level and uniform in thickness.
- Add Holiday Sprinkles: Immediately after pouring, sprinkle your chosen holiday sprinkles evenly across the top. The residual warmth of the fudge will help the sprinkles stick slightly without melting, creating a festive and colorful surface.
- Optional Toppings: You can add extra touches such as a drizzle of melted white chocolate, crushed candy canes, or chopped peanuts to enhance flavor, texture, and presentation. Be careful not to overload the surface, or the fudge may crack when slicing.
- Chill to Set: Place the pan in the refrigerator for at least 2-3 hours, or until the fudge is firm to the touch. For best results, allow it to chill overnight. Proper chilling ensures the fudge slices cleanly and maintains a creamy yet firm texture.
Pro Tips for Perfect Setting
- Do not cover the pan tightly while the fudge is still warm, as condensation can create a sticky surface.
- Use parchment overhanging the pan edges for easy removal once set. This prevents cracking or breaking.
- For perfectly even slices, use a sharp knife dipped in hot water before each cut.
- If desired, let the fudge come to room temperature for 5-10 minutes before serving for a softer bite.
After chilling, your Peanut Butter Christmas Fudge should be firm yet creamy, with vibrant sprinkles creating a festive look. Each bite delivers a perfect balance of rich peanut butter, sweet white chocolate, and buttery smoothness that makes this holiday treat irresistible.
Step-by-Step Instructions
- Lift the Fudge: Using the parchment paper overhang, carefully lift the entire block of fudge from the pan and place it on a clean cutting board. This prevents any sticking and allows you to work with ease.
- Choose Your Knife: Use a sharp chef’s knife for clean, straight edges. For best results, dip the knife in hot water and wipe it dry before slicing. The heat helps glide through the fudge without cracking or dragging sprinkles.
- Measure & Cut: Depending on your desired portion sizes, cut the fudge into 1-inch or 1.5-inch squares. Try to keep pieces uniform to make serving easier and visually appealing. Repeat dipping the knife in hot water for each cut.
- Optional Garnish: For extra flair, sprinkle a few crushed candy canes, mini chocolate chips, or extra festive sprinkles on top after cutting. This gives each piece a professional, holiday-ready look.
- Storage Tips: Place the cut fudge in an airtight container. Separate layers with parchment or wax paper to prevent sticking. Keep at room temperature for up to 5 days, or refrigerate for up to 2 weeks for a firmer texture. Freeze for longer storage, up to 3 months.
- Serving Suggestions: Serve your fudge on a festive platter with holiday cookies, hot cocoa, or coffee for a delightful dessert spread. These bite-sized treats are perfect for gifting in small holiday tins or wrapped individually in parchment paper.
Pro Tips for Perfect Fudge
- Make sure your knife is always clean and slightly warm to achieve smooth, professional cuts.
- Let refrigerated fudge sit at room temperature for 5-10 minutes before serving for optimal creaminess.
- If gifting, wrap each square with festive parchment and tie with a small ribbon for a charming holiday presentation.
- Do not stack the fudge too high without separators, as this can crush the delicate sprinkles and toppings.
By following these steps, your Peanut Butter Christmas Fudge will not only taste incredible but also look like it came straight from a gourmet bakery. The rich peanut butter and sweet white chocolate, combined with festive sprinkles, create an unforgettable holiday treat that will delight family and friends.
Final Touches & Presentation
- Layering for a Stunning Display: Arrange the fudge squares on a decorative plate or tiered dessert stand. Use parchment paper doilies or holiday-themed liners for added elegance.
- Additional Garnishes: Sprinkle lightly with edible glitter, crushed candy canes, or festive colored sugar to make the fudge visually pop. Small chocolate curls or mini holiday-themed sprinkles can add texture and color.
- Serving Temperature: Let the fudge sit at room temperature for 5–10 minutes before serving if refrigerated. This ensures a creamy, melt-in-your-mouth texture that guests will love.
- Gift Packaging: For gifting, wrap individual squares in parchment paper and tie with a ribbon, or place in decorative mini boxes. Fudge keeps beautifully in airtight containers, making it ideal for mail or neighbor gifts.
Expert Pro Tips
- Always use high-quality peanut butter and white chocolate to ensure a rich, creamy flavor.
- Allow the fudge to set fully at room temperature or in the fridge for at least 2–3 hours before cutting. This helps maintain clean edges and prevents crumbling.
- When making ahead, store in layers with parchment paper separators to protect the decorative toppings.
- Experiment with flavor variations, such as a drizzle of dark chocolate, a pinch of sea salt, or chopped nuts, to give each batch a unique twist.
Serving Suggestions
This Peanut Butter Christmas Fudge pairs beautifully with warm beverages like hot cocoa, coffee, or mulled cider. Serve as part of a holiday dessert platter alongside cookies, truffles, or chocolate bark for a festive presentation. It also works as a sweet, indulgent treat for office parties, family gatherings, or holiday gift exchanges.
Conclusion
In summary, this no-bake Peanut Butter Christmas Fudge combines rich white chocolate, creamy peanut butter, and festive sprinkles to create a dessert that is both visually stunning and irresistibly delicious. Its simplicity, combined with gourmet flair, makes it perfect for home bakers of all skill levels. By following these detailed steps, including the expert tips, your fudge will consistently impress family, friends, and holiday guests. Not only is it a treat for the taste buds, but it also stands out in presentation, making it a must-have for any holiday celebration. Enjoy the process, savor every bite, and spread the holiday cheer with this delightful, creamy, and festive dessert!